Cloudflare is the most popular content delivery network service provider. Which also incudes DNS, DDoS protection and security for the websites. In action cloudflare act as reverse proxy server. Once the website traffic is routed with cloudflare network, the backend server don’t know the actual visitor ip. In result, you will see the cloudflare IP address in Apache logs.
Now the question is how to get the real visitor IP in logs, instead of cloudflare IP. To resolve this, cloudflare provides an Apache module to get real visitor ip and log them.
This tutorial will help you to enable Apache mod_cloudflare module on Debian system. Which will log real visitor IP address to Apache access logs.
Install Apache mod_cloudflare on Debian
The cloudflare provides an official module for the Apache server to capture real ip address. You need to enable the PPA of cloudflare module to your Ubuntu system.
Add GPG – Open a terminal and execute below commands to enable add gpg key to your system.
sudo apt install curlcurl -C - https://pkg.cloudflare.com/pubkey.gpg | sudo apt-key add -
Add PPA – Then add the cloudflare repository to your debian system
echo "deb http://pkg.cloudflare.com/ `lsb_release -cs` main" | sudo tee /etc/apt/sources.list.d/cloudflare.list
Install Package – Next, update Apt cache and install libapache2-mod-cloudflare package on your Ubuntu system.
sudo apt updatesudo apt install libapache2-mod-cloudflare
Press ‘Y’ for any confirmation asked during the installation.
Restart Apache
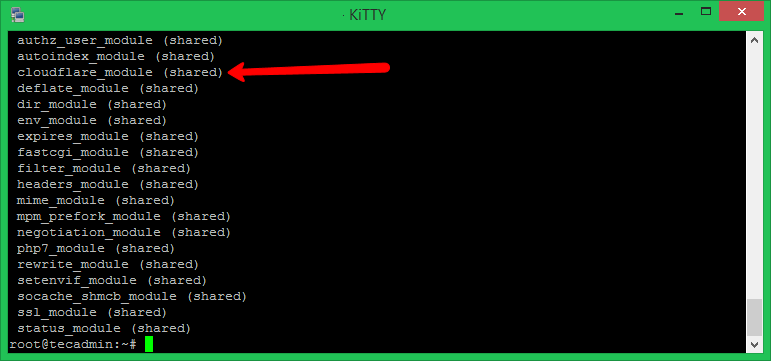
Once the installation completed, restart Apache2 service and check the active modules using the following commands.
sudo systemctl restart apache2
That’s it. The Apache server will log real IP address of the visitor to the logs.
sudo apache2ctl -M
Conclusion
In this tutorial, you have learned to install Apache cloudflare module on Debian Linux system.


1 Comment
Thanks a lot