The common way to run PHP with Apache is the mod_php module. But PHP-FPM has several advantages over this. The PHP-FPM (FastCGI Process Manager) dramatically increases the performance of your Apache/PHP environment. So this is useful for high load websites. This tutorial will help you to configure PHP-FPM with Apache on CentOS 8 and RHEL 8 Linux system.
Prerequsities
- Shell access to the CentOS 8 system with sudo privileges account.
- Complete initial server setup for newly installed systems.
Step 1 – Install Apache
The Apache packages are available under the default AppStream repository. You can simply update the DNF cache and install Apache web server packages using the following commands.
sudo dnf update
sudo dnf install httpd httpd-tools mod_ssl
The mod_ssl package provides the functionality to use an SSL certificate for secure HTTP. After installation, enable the httpd service and start.
sudo systemctl enable httpd
sudo systemctl start httpd
Step 2 – Install PHP with PHP-FPM
The Remi repository contains the latest PHP packages for the CentOS 8 Linux system. So first of all, you need to add the REMI repository to your system. Just execute the following command to add the repository.
sudo dnf install dnf-utils http://rpms.remirepo.net/enterprise/remi-release-8.rpm
Then enable the required DNF module for PHP installation. Here we are enabling the module for installing PHP 7.4. You can change this to PHP 7.3 or PHP 7.2 as per your requirements.
sudo dnf module reset php
sudo dnf module enable php:remi-7.4
Now, install the PHP on your system. As we are going to use FastCGI Process Manager (FPM) for this setup. So install the php-fpm package as well.
sudo dnf update
sudo dnf install php php-fpm  php-gd php-mysqlnd
You may also require some more PHP modules, So install them before going next. After completing PHP installation enable PHP-FPM service and start it.
sudo systemctl enable php-fpm
sudo systemctl start php-fpm
Make sure the php-fpm service is running.
sudo systemctl status php-fpm

● php-fpm.service - The PHP FastCGI Process Manager
   Loaded: loaded (/usr/lib/systemd/system/php-fpm.service; disabled; vendor preset: disabled)
   Active: active (running) since Mon 2019-12-09 21:44:57 PST; 1h 24min ago
 Main PID: 29280 (php-fpm)
   Status: "Processes active: 0, idle: 5, Requests: 3, slow: 0, Traffic: 0req/sec"
    Tasks: 6 (limit: 10321)
   Memory: 24.6M
   CGroup: /system.slice/php-fpm.service
           ├─29280 php-fpm: master process (/etc/php-fpm.conf)
           ├─29281 php-fpm: pool www
           ├─29282 php-fpm: pool www
           ├─29283 php-fpm: pool www
           ├─29284 php-fpm: pool www
           └─29285 php-fpm: pool www

Dec 09 21:44:57 tecadmin.example.com systemd[1]: Starting The PHP FastCGI Process Manager...
Dec 09 21:44:57 tecadmin.example.com systemd[1]: Started The PHP FastCGI Process Manager.
Step 3 – Configure PHP-FPM
At this step, you have installed all the required packages. Let’s start the configuration process. First, edit PHP-FPM configuration file for Apache:
sudo vim /etc/php-fpm.d/www.conf
Make the changes like below. The latest versions of Apache can connect to the socket using a proxy. So make sure listen is set to a socket file.
Then set user and group the same as Apache server using. If you need to connect FPM from a remote system change listen.allowed_clients to LAN IP instead of 127.0.0.1.
1 2 3 4 5 6 7 8 9 10 11 | ; listen = 127.0.0.1:9000 listen = /run/php-fpm/www.sock user = apache group = apache listen.allowed_clients = 127.0.0.1 listen.owner = apache listen.group = apache listen.mode = 0660 pm = dynamic |
After making changes restart the php-fpm service to apply changes.
sudo systemctl restart php-fpm
Step 4 – Create Apache VirtualHost
Now, the time is to configure Apache to use php-fpm for processing PHP files. Here is two options, Either you use FPM as default for all virtual hosts or you can specifically configure Virtual host to use FPM. In this way, other virtual hosts will not be affected.
For this example, I am configuring FPM for a specific virtual host only. So edited configuration file in text editor:
sudo vim /etc/httpd/conf.d/example.com.conf
Now added proxy configuration using a socket file. Also configured all PHP script to use fpm handler for execution.
1 2 3 4 5 6 7 8 9 10 11 12 13 14 15 16 17 18 19 20 21 22 23 24 25 | <VirtualHost *:80> ServerAdmin admin@example.com DocumentRoot /var/www/html ServerName example.com ServerAlias www.example.com # Proxy declaration <Proxy "unix:/run/php-fpm/www.sock|fcgi://php-fpm"> # we must declare a parameter in here (doesn't matter which) or # it'll not register the proxy ahead of time ProxySet disablereuse=off # Note: If you configure php-fpm to use the "pm = ondemand" #then use "ProxySet disablereuse=on" </Proxy> <FilesMatch \.php$> SetHandler proxy:fcgi://php-fpm </FilesMatch> ErrorLog logs/example.com-error.log CustomLog logs/example.com-access.log combined </VirtualHost> |
Save the virtual host configuration file and reload Apache to apply changes.
sudo systemctl restart httpd
Step 5 – Enable Firewall Rules
Your server is ready to serve the application. If there is a firewall enabled on your system, make sure Apache ports are open to access from remote systems.
The following commands will open the required ports for you.
sudo firewall-cmd --zone=public --permanent --add-service=http
sudo firewall-cmd --zone=public --permanent --add-service=https
sudo firewall-cmd --reload
Step 6 – Test Setup
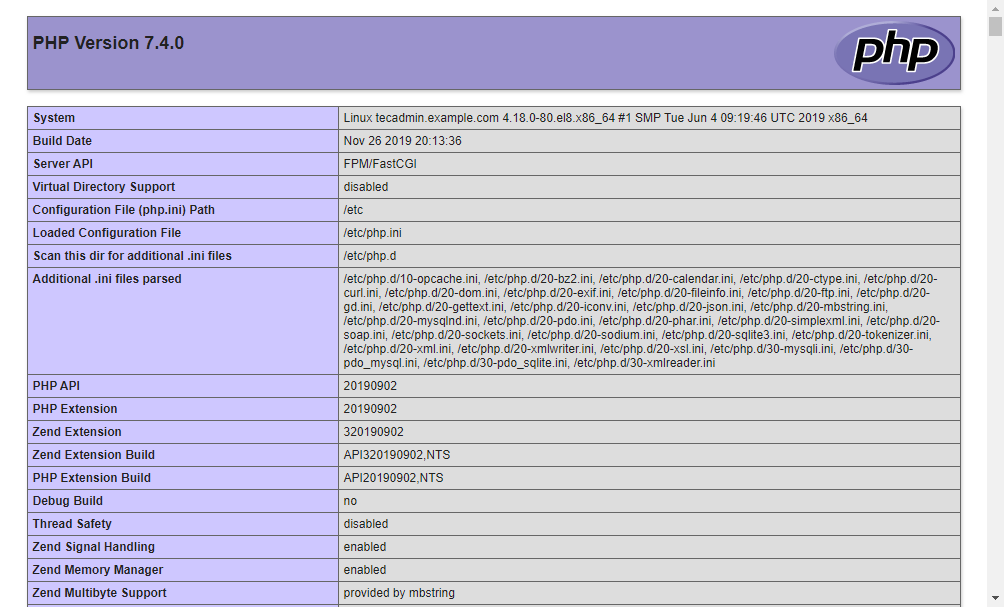
All done. To test the environment, create a PHP script with phpinfo() function. Place this file to your server document root. Use the below command to do this.
echo "<?php phpinfo(); ?>" > /var/www/html/info.php
Then access info.php using server IP address (for default VirtualHost) for your configured domain in Apache VirtualHost.
http://localhost/info.php
Conclusion
You have successfully configured an Apache with PHP-FPM on your CentOS 8 or RHEL 8 Linux system. You can now host a website from your server.


3 Comments
thanks for the great tutorial. could you maybe do another one, how to use different/multiple versions of php and where/how to define which version is used?
I’ve seen some tutorials for ubunto but not for CentOS. How could I use:
php 7.4 for postfixadmin
php 8.0 for wordpress / web tools
I guess, i have to put some directives/commands into the vhost files?
Hope to read from you,
all the best
Frank
That one is form Debian: ‘apt install php php-fpm php-gd php-mysqlnd’ 🙂
Thanks Mike. tutorial has been updated