CentOS Web Panel in short CWP is a free web hosting control panel designed easy management of (Dedicated & VPS) servers without of need to use ssh console. This works for RPM-based distributions only. To use this control panel you must have CentOS, RHEL or CloudLinux operating system on your server. CWP provides easy tool for migrating accounts from cPanel server to CWP with few clicks.
This article will help you to install CentOS Web Panel CentOS/RHEL & CloudLinux systems.
Step 1 – System Requirements
To install CentOS Web Panel, your system must have a minimum of 512MB RAM for 32bit Server and 1024MB RAM for 64-bit Server. CentOS Web Panel supported CentOS 6, RedHat 6 or CloudLinux 6.
Step 2 – Update Your System
Before starting installation of CWP, first install some required packages and update all packages on system with below commands.
yum install wget
yum update
After completing update, reboot your server once.
reboot
Step 3 – Install CentOS Web Panel
Now start the installation of CWP on your system. Download the installation script from CWP official site using the following command.
cd /usr/local/src
wget http://centos-webpanel.com/cwp-latest
Now, just execute the cwp-latest script to start the installation. This process may take long time as per you Internet speed and server configuration.
sh cwp-latest
At the end of installation you will get a message like below.
#############################
#      CWP Installed        #
#############################

go to CentOS WebPanel Admin GUI at http://SERVER_IP:2030/

http://11.22.33.44:2030
SSL: https://11.22.33.44:2031
---------------------
Username: root
Password: ssh server root password
MySQL root Password: jRrhSlsTPja6

#########################################################
          CentOS Web Panel MailServer Installer
#########################################################
SSL Cert name (hostname): svr1.tecadmin.net
SSL Cert file location /etc/pki/tls/ private|certs
#########################################################

visit for help: www.centos-webpanel.com
Write down login details and press ENTER for server reboot!
Press ENTER for server reboot!
CWP Post Install Setup
At this stage, you have successfully installed CWP on your system. Now login to your CentOS web panel Admin GUI using one of following URLs.
UnSecure URL: http://SERVER-IP:2030/
Secure URL: https://SERVER-IP:2031/

Now complete the following steps
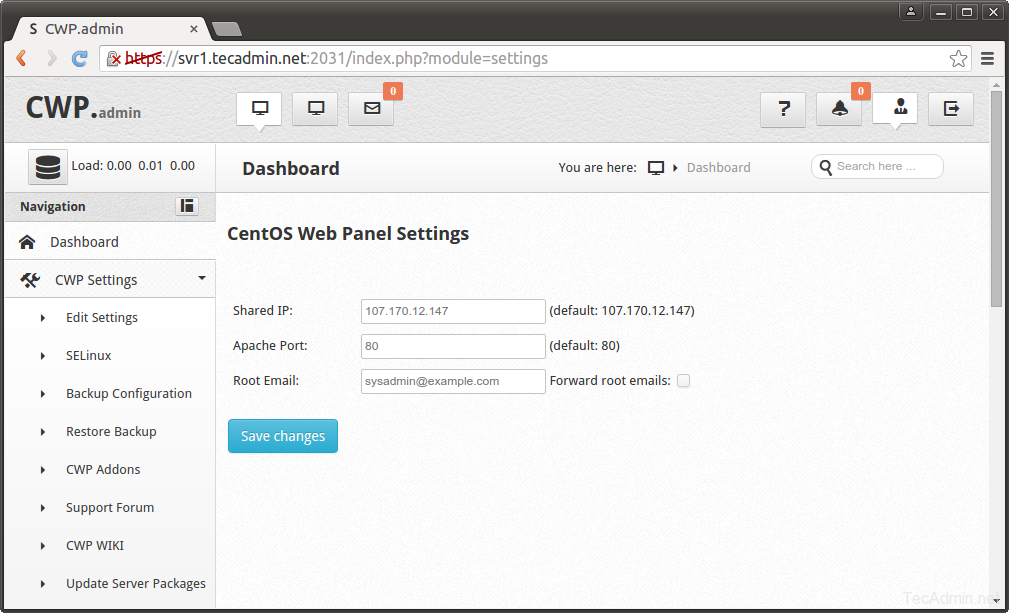
1 – Setup root Email and Shared IP
After login to CWP, Go to CWP Settings >> Edit Settings. Configured shared IP must be a valid public IP configured on your server. This will be shared by all shared hosting accounts on the server.
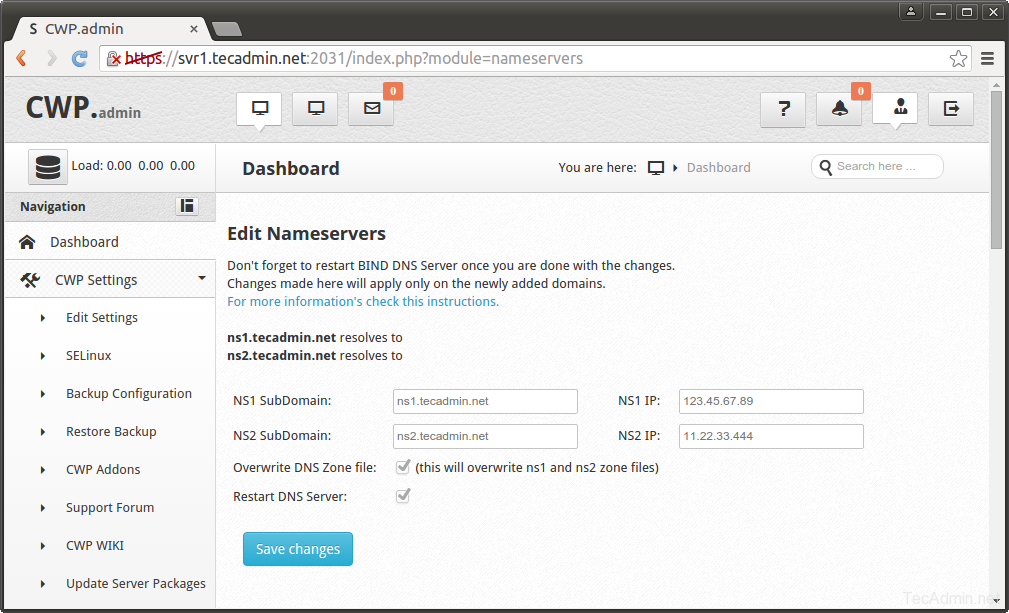
2 – Setup Nameservers
Now Go to DNS Functions >> Edit Nameservers IPs and configure your nameservers like below screen.
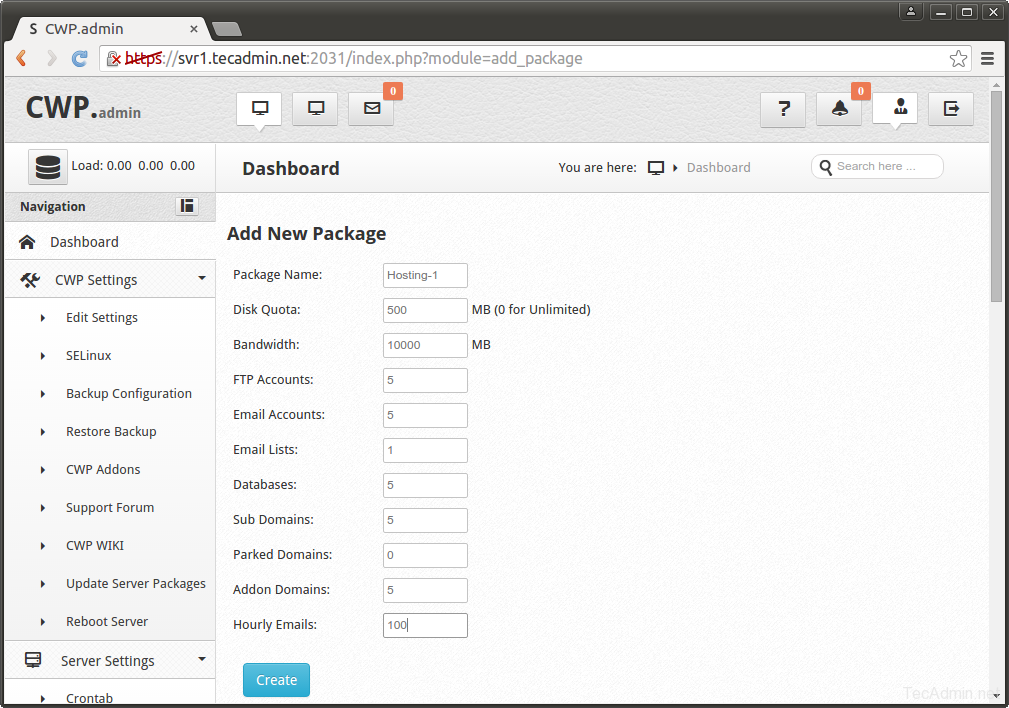
3 – Setup Hosting Package
CWP installer create a default packages for you to start. You can simply edit that package or create a new package as per your hosting requirement. To create new package got to Package >> Add a Package.
You have all done! Let’s enjoy hosting with CentOS Web Panel.
2 Comments
Thanks for writing this awesome post. You have highlighted all the key points and it seems great to me. I really enjoyed reading it. Although, It’s a long process but If some one is looking for a shorter process then you can go for managed aws cloud hosting provided by Cloudways and install ad manage the process with just one click.
Thank you for this post. Simply very useful.