If you’re a Linux user, you know that installing Webmin on your Fedora or CentOS machine can be a bit of a challenge. But no more! In this blog post, I’m going to show you how to get the latest version of Webmin up and running on your Fedora machine with minimal effort. Read on to learn how to easily install the latest Webmin on Fedora and access its control panel.

This article will help you to install and configure Webmin on CentOS, RHEL, and Fedora systems. Follow the below steps:
Prerequsities
The following are the optional dependencies for the Webmin. You can install them using below command:
dnf install wget perl perl-Net-SSLeay openssl perl-IO-Tty perl-Encode-Detect perl-Data-Dumper
Download Webmin RPM
Webmin RPMs are available on its official site. Download it from there or use below command to download. Webmin provides a noarch file, so I can be easily installed on any architecture system. Also, download the GPG key for Webmin
wget http://www.webmin.com/jcameron-key.ascwget http://www.webmin.com/download/rpm/webmin-current.rpm
Install Latest Webmin
After downloading the latest Webmin rpm, use the following command to install or update it. You must import the GPG key before installing Webmin packages on your system.
sudo rpm --import jcameron-key.ascsudo rpm -Uvh webmin-current.rpm
This command will install the necessary packages and configure Webmin on your machine. Once the installation is complete, you’ll be ready to move on to the next step.
Accessing the Webmin Control Panel
Now that Webmin has been installed on your machine, you can access the Webmin control panel. To do this, you’ll need to open a web browser and navigate to the Webmin URL. This URL is typically in the format of http://localhost:10000.
https://localhost :10000
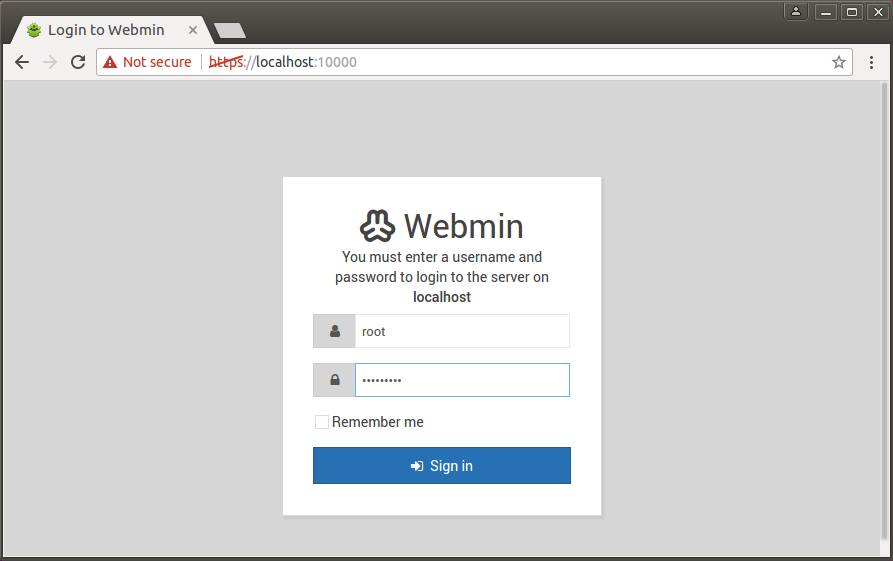
Once you’ve navigated to the URL, you’ll be prompted to log in using the username and password you created during the installation process. Once you’ve logged in, you’ll be taken to the main Webmin control panel.
From here, you can customize your settings, create users, manage services, and more. You’ll also be able to access the Webmin Documentation page, which provides helpful tutorials and guides to help you get the most out of Webmin.
Advanced Webmin Tips and Tricks
Once you’ve gotten comfortable with the basics of Webmin, you can start exploring some of the more advanced features. For example, you can set up a cron job to automate certain tasks. This can be useful if you have recurring tasks that need to be done on a regular basis.
You can also create virtual hosts so you can host multiple websites on one machine. This can be a great way to save money on hosting fees and make sure that your websites are always up and running.
Finally, you can use Webmin to secure your system. Here, you can configure the firewall, set up user accounts, and manage user permissions. This can help make sure that your system is protected from malicious activity.
Conclusion
Installing Webmin on your Fedora machine can be a bit of a challenge, but with the right steps, it’s easy and hassle-free. In this blog post, I’ve shown you how to download the latest version of Webmin, install it on your machine, access the control panel, customize your settings, and explore some of the advanced features.
So, if you’re looking for an easy way to manage your Fedora machine, Webmin is a great choice. It’s quick, easy to install, and comes with a range of features that can make managing your system a breeze. So, what are you waiting for? Get Webmin up and running on your machine today!


18 Comments
Okay, found another article and installed the prereqs. So far so good.
Thanks.
Hi, Downloaded the files referenced. Trying to install it, but getting these errors, please advise:
[root@ptlsnd04 ~]# cd /opt
[root@ptlsnd04 opt]# ls
jcameron-key.asc quest rh storix webmin-current.rpm
[root@ptlsnd04 opt]# rpm –import jcameron-key.asc
[root@ptlsnd04 opt]# rpm -Uvh webmin-current.rpm
error: Failed dependencies:
perl(Net::SSLeay) is needed by webmin-1.920-1.noarch
perl(Encode::Detect) is needed by webmin-1.920-1.noarch
[root@ptlsnd04 opt]# rpm -qa | grep perl
perl-libs-5.16.3-294.el7_6.x86_64
perl-Filter-1.49-3.el7.x86_64
perl-PathTools-3.40-5.el7.x86_64
perl-Data-Dumper-2.145-3.el7.x86_64
perl-Git-1.8.3.1-20.el7.noarch
perl-Pod-Usage-1.63-3.el7.noarch
perl-Time-Local-1.2300-2.el7.noarch
perl-Carp-1.26-244.el7.noarch
perl-Thread-Queue-3.02-2.el7.noarch
perl-podlators-2.5.1-3.el7.noarch
perl-Encode-2.51-7.el7.x86_64
perl-threads-1.87-4.el7.x86_64
perl-Time-HiRes-1.9725-3.el7.x86_64
perl-File-Temp-0.23.01-3.el7.noarch
perl-Socket-2.010-4.el7.x86_64
perl-Error-0.17020-2.el7.noarch
perl-TermReadKey-2.30-20.el7.x86_64
perl-Pod-Escapes-1.04-294.el7_6.noarch
perl-5.16.3-294.el7_6.x86_64
perl-HTTP-Tiny-0.033-3.el7.noarch
perl-Text-ParseWords-3.29-4.el7.noarch
perl-Exporter-5.68-3.el7.noarch
perl-threads-shared-1.43-6.el7.x86_64
perl-Scalar-List-Utils-1.27-248.el7.x86_64
perl-Getopt-Long-2.40-3.el7.noarch
perl-Test-Harness-3.28-3.el7.noarch
perl-parent-0.225-244.el7.noarch
perl-constant-1.27-2.el7.noarch
perl-Pod-Simple-3.28-4.el7.noarch
perl-macros-5.16.3-294.el7_6.x86_64
perl-srpm-macros-1-8.el7.noarch
perl-Pod-Perldoc-3.20-4.el7.noarch
perl-Storable-2.45-3.el7.x86_64
perl-File-Path-2.09-2.el7.noarch
perl-XML-Parser-2.41-10.el7.x86_64
Thanks.
Try below:
yum -y install perl perl-Net-SSLeay openssl perl-IO-Tty perl-Encode-Detect
It is helpful. Thanks
Thanks
Parabéns, e muito obrigado ajudo bastante.
ok thank yu… nice…. !!!
Thanks for this excelente tutos
for clean centos firstly run this commend :
yum -y install perl perl-Net-SSLeay openssl perl-IO-Tty
Thank You 😉
What is the best way to set this up as an httpd/apache vhost so its managed by apache instead of webmin service?
Thanks for the good article. Very simple.
dnf install perl-Net-SSLeay
must be launched BEFORE this tutorial, or a dependency check will fail.
SSL is not working. i can login only normally. Any help?
Finally, webmin installed on my server, This tutorial is very helpful.
This article is very helpful me.
Good tutorial. Only suggestion would be to add a note about disabling the firewall temporarily to allow access to view Webmin in the browser. Once in, change the port from 10000 and check the box to “Open new ports on firewall”, then enable the firewall again and all will be good.
Great One, Helped Me A Lot . Thanks 🙂
Excelente tutorial,obrigado!