The common way to run PHP with Nginx is the FastCGI module. The PHP-FPM (FastCGI Process Manager) dramatically increases the performance of your Nginx/PHP environment. So this is useful for high load websites. This tutorial will help you to configure PHP-FPM with Nginx on CentOS 8 and RHEL 8 Linux system.
Prerequsities
- The newly installed system’s recommended to follow initial server setup.
- Shell access to the CentOS 8 system with sudo privileges account.
Step 1 – Install Nginx
The Nginx packages are available under the default AppStream repository. You can simply update the DNF cache and install Nginx web server packages using the following commands.
sudo dnf update
sudo dnf install nginx
After installation of packages starts Nginx service, Also enable Nginx service to auto-start on system boot.
sudo systemctl enable nginx
sudo systemctl start nginx
Step 2 – Install PHP with PHP-FPM
The Remi repository contains the latest PHP packages for the CentOS 8 Linux system. So first of all, you need to add the REMI repository to your system. Just execute the following command to add the repository.
sudo dnf install dnf-utils http://rpms.remirepo.net/enterprise/remi-release-8.rpm
Then enable the required DNF module for PHP installation. Here we are enabling the module for installing PHP 7.4. You can change this to PHP 7.3 or PHP 7.2 as per your requirements.
sudo dnf module reset php
sudo dnf module enable php:remi-7.4
Now, install the PHP on your system. As we are going to use FastCGI Process Manager (FPM) for this setup. So install the php-fpm package as well.
sudo dnf update
sudo dnf install php php-fpm  php-gd php-mysqlnd
You may also require some more PHP modules, So install them before going next. After completing PHP installation enable PHP-FPM service and start it.
sudo systemctl enable php-fpm
sudo systemctl start php-fpm
Make sure the php-fpm service is running.
sudo systemctl status php-fpm

● php-fpm.service - The PHP FastCGI Process Manager
   Loaded: loaded (/usr/lib/systemd/system/php-fpm.service; disabled; vendor preset: disabled)
   Active: active (running) since Mon 2019-12-09 21:44:57 PST; 1h 24min ago
 Main PID: 29280 (php-fpm)
   Status: "Processes active: 0, idle: 5, Requests: 3, slow: 0, Traffic: 0req/sec"
    Tasks: 6 (limit: 10321)
   Memory: 24.6M
   CGroup: /system.slice/php-fpm.service
           ├─29280 php-fpm: master process (/etc/php-fpm.conf)
           ├─29281 php-fpm: pool www
           ├─29282 php-fpm: pool www
           ├─29283 php-fpm: pool www
           ├─29284 php-fpm: pool www
           └─29285 php-fpm: pool www

Dec 09 21:44:57 tecadmin.example.com systemd[1]: Starting The PHP FastCGI Process Manager...
Dec 09 21:44:57 tecadmin.example.com systemd[1]: Started The PHP FastCGI Process Manager.
Step 3 – Configure PHP-FPM
At this step, you have installed all the required packages. Let’s start the configuration process. First, edit PHP-FPM configuration file:
sudo vim /etc/php-fpm.d/www.conf
Make the changes like below. The latest versions of Nginx can connect to the socket using a proxy. So make sure listen is set to a socket file.
Then set user and group the same as Nginx server using. If you need to connect FPM from a remote system change listen.allowed_clients to LAN IP instead of 127.0.0.1.
1 2 3 4 5 6 7 8 9 10 11 | ; listen = 127.0.0.1:9000 listen = /run/php-fpm/www.sock user = www-data group = www-data listen.allowed_clients = 127.0.0.1 listen.owner = www-data listen.group = www-data listen.mode = 0660 pm = dynamic |
After making changes restart the php-fpm service to apply changes.
sudo systemctl restart php-fpm
Step 4 – Create Nginx Server Block
Now, create a server block in Nginx for your domain and configure it to use php-fpm for processing PHP files. Create a server block file and edit in a text editor:
sudo vim /etc/nginx/conf.d/example.com.conf
Now added proxy configuration using a socket file. Also configured all PHP script to use fpm handler for execution.
1 2 3 4 5 6 7 8 9 10 11 12 13 14 15 16 17 18 19 | server { listen 80 default_server; server_name example.com www.example.com; root /var/www/html; # Load configuration files for the default server block. include /etc/nginx/default.d/*.conf; location / { } location ~* \.php$ { # With php-fpm unix sockets fastcgi_pass unix:/run/php-fpm/www.sock; include fastcgi_params; fastcgi_param SCRIPT_FILENAME $document_root$fastcgi_script_name; fastcgi_param SCRIPT_NAME $fastcgi_script_name; } } |
Save the server block configuration file and restart the Nginx service to apply changes.
sudo systemctl restart nginx
Step 5 – Enable Firewall Rules
Your server is ready to serve the application. If there is a firewall enabled on your system, make sure HTTP ports are open to access from remote systems.
The following commands will open the required ports for you.
sudo firewall-cmd --zone=public --permanent --add-service=http
sudo firewall-cmd --zone=public --permanent --add-service=https
sudo firewall-cmd --reload
Step 6 – Test Setup
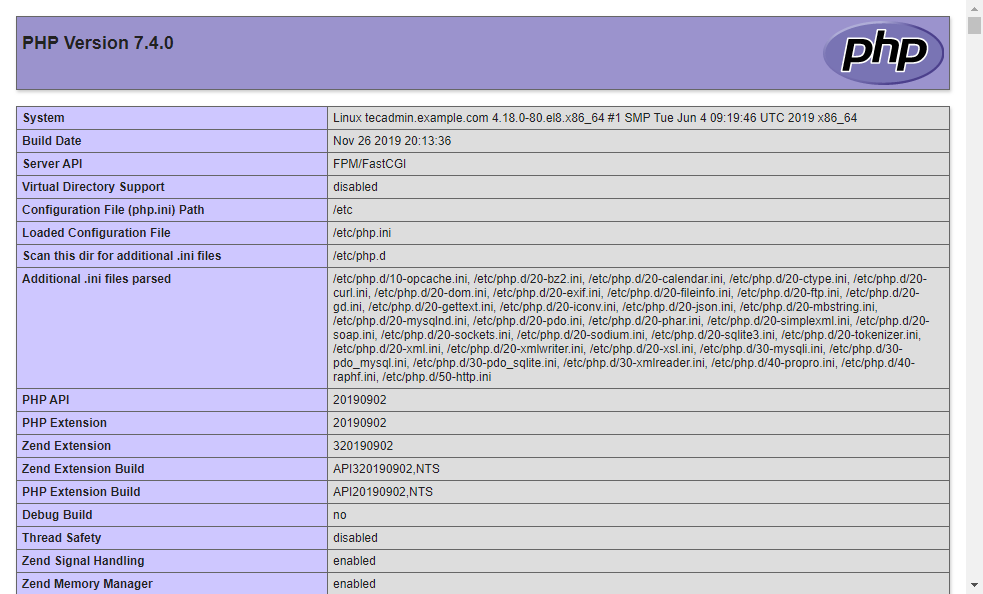
All done. To test the environment, create a PHP script with phpinfo() function. Place this file to your server document root. Use the below command to do this.
echo "<?php phpinfo(); ?>" > /var/www/html/info.php
Then access info.php using server IP address (for default VirtualHost) for your configured domain in the Nginx server block.
http://localhost/info.php
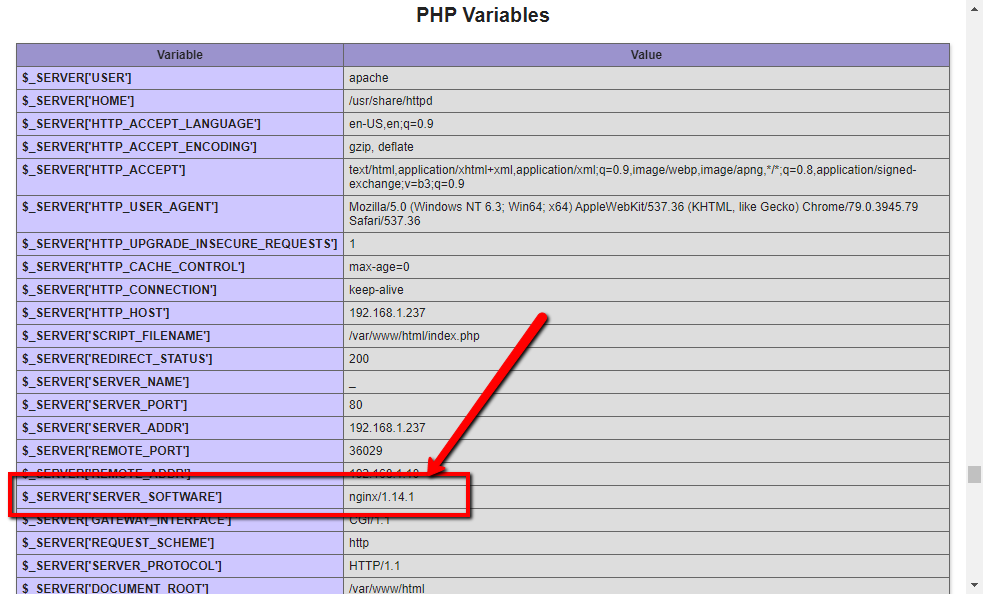
Slide down the page and check value of $_SERVER[‘SERVER_SOFTWARE’] under PHP Variables section. This will show you the Web server name running on.
Conclusion
You have successfully configured an Nginx with PHP-FPM on your CentOS 8 or RHEL 8 Linux system. You can now host a website from your server.


3 Comments
Thanks for the manual!
sudo yum instead of sudo apt when installing php-fpm
Thanks Afiq,