Swift is a safe, fast, expressive general-purpose programming language build for the software design patterns. It is best for the systems programming, to mobile and desktop applications. Swift provides a large number of features that make programming easier while giving the developer the control needed in a true systems programming language.
This tutorial will help you to install swift programming language on your Ubuntu 18.04 LTS Bionic Linux system.
Step 1 – Prerequisites
Login to your Ubuntu 18.04 system using SSH (Shell) access. Now install the required dependencies for swift installation on your system.
sudo apt-get install clang
For the new Ubuntu 18.04 installation, I also needed to install following packages to work swift properly.
sudo apt-get install libcurl3 libpython2.7 libpython2.7-dev
Step 2 – Install Swift Ubuntu 18.04
Now, you need to download the latest available swift release from its official site. You can use below command to download Swift 4.2.1 on the Ubuntu 18.04 Bionic system.
wget https://swift.org/builds/swift-4.2.1-release/ubuntu1804/swift-4.2.1-RELEASE/swift-4.2.1-RELEASE-ubuntu18.04.tar.gz
Then extract the downloaded archive
tar xzf swift-4.2.1-RELEASE-ubuntu18.04.tar.gz
sudo mv swift-4.2.1-RELEASE-ubuntu18.04 /usr/share/swift
Also, configure the swift binary to system’s PATH environment variable.
echo "export PATH=/usr/share/swift/usr/bin:$PATH" >> ~/.bashrc
source  ~/.bashrc
Step 3 – Verify Swift Version
Use the following command to check the current installed Swift version on your system.
swift --version

Swift version 4.2.1 (swift-4.2.1-RELEASE)
Target: x86_64-unknown-linux-gnu
Step 4 – Swift REPL Examples
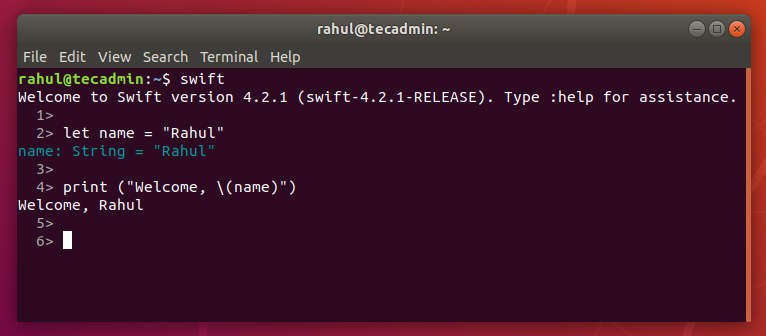
Just type swift on your system console and you will get Swift console. You can use this console for quick operations and for the learning purpose.
swift

Welcome to Swift version 4.2.1 (swift-4.2.1-RELEASE). Type :help for assistance.
  1>
Now, run some sample commands to test the console running properly.

6 Comments
gracias from Peru
it works just perfect!!
Don’t use this on windows subsystem for linux. This broke my .bashrc file:
-bash: /home/bruce/.bashrc: line 120: syntax error near unexpected token `(‘
This is actually due to the fact that wsl inherits the windows path, and can insert a reference like this one:
:/mnt/c/Program Files (x86)/Yarn/bin:
You should instead use nano to modify the path manually.
can you explain more?
Here’s what happens when I try to run ‘swift’:
/usr/share/swift/usr/bin/lldb: error while loading shared libraries: libncurses.so.5: cannot open shared object file: No such file or directory
huge help! Thanks
Dear Mr.Rahul ,
I got problem in step 2 ,
………
Reading package lists… done
Building dependecy tree
Reading state information… done
E: Unable to locate package lib
……….
Could you help me to solve it , i am newbie about this
Regards,
Ron