XCache is a fast, stable PHP opcode cacher. This relatively new opcode caching software has been developed by mOo. XCache optimizes performance caching the compiled state of PHP scripts into the RAM and uses the compiled version straight from the RAM. This may increase php execution 1-5 times faster than default installation. Read more about XCache.
Step 1: Install XCache PHP Module in cPanel
To install module in cPanel server, you must have root access using. Access your server using putty or other alternatives of putty with root user and run following command.
# /scripts/phpextensionmgr install xcache
[Sample Output on Finishing compilation]
...
...
Build complete.
Don't forget to run 'make test'.

Got ret value 0 from system( make )
Will now run system( make,install )
Installing shared extensions:     /usr/local/lib/php/extensions/no-debug-non-zts-20100525/
...
...
Got ret value 0 from system( make,clean )
Xcache extension activated
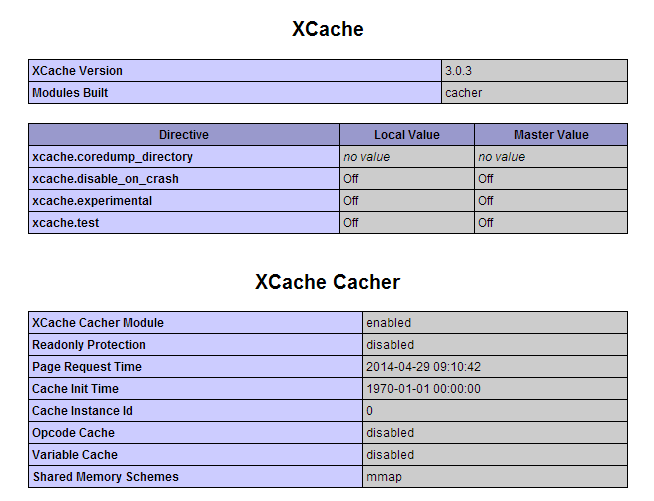
Step 2: Verify XCache PHP Module
As you have successfully installed and activated xcache php module in cPanel system. Let’s verify the xcache installation using following command.
#php -v PHP 5.4.22 (cli) (built: Dec 14 2013 03:20:46) Copyright (c) 1997-2013 The PHP Group Zend Engine v2.4.0, Copyright (c) 1998-2013 Zend Technologies with XCache v3.0.3, Copyright (c) 2005-2013, by mOo with the ionCube PHP Loader v4.4.1, Copyright (c) 2002-2013, by ionCube Ltd. with XCache Cacher v3.0.3, Copyright (c) 2005-2013, by mOo
Alternatively you can create an info.php on your server website document root using following text and access from web browser
<?php
  phpinfo();
?>