AnyDesk is an outstanding application for the remote desktop similar to TeamViewer. You can say it an alternative of the TeamViewer, which is available freely. Anydesk provides a faster remote connection than any other existing remote desktop application. Personally, I also love it and use. This tutorial will help you to install AnyDesk on Ubuntu systems.
But, if you still love TeamViewer, You can also install TeamViewer using these instructions.
Step 1 – Install AnyDesk on Ubuntu
Anydesk is available in both 64-Bit and 32-Bit formats. You can directly download Debian packages from its official website. Otherwise use the apt repository to install package.
First of all, add the repository key to Trusted software providers list
wget -qO - https://keys.anydesk.com/repos/DEB-GPG-KEY | apt-key add -
Then configure the Anydesk apt repository:
echo "deb http://deb.anydesk.com/ all main" > /etc/apt/sources.list.d/anydesk.list
Finally, install the Anydesk on Ubuntu system by executing following commands on your system.
sudo apt update
sudo apt install anydesk
The above commands will install Anydesk on your Ubuntu system including any dependencies.
Step 2 – Launch AnyDesk
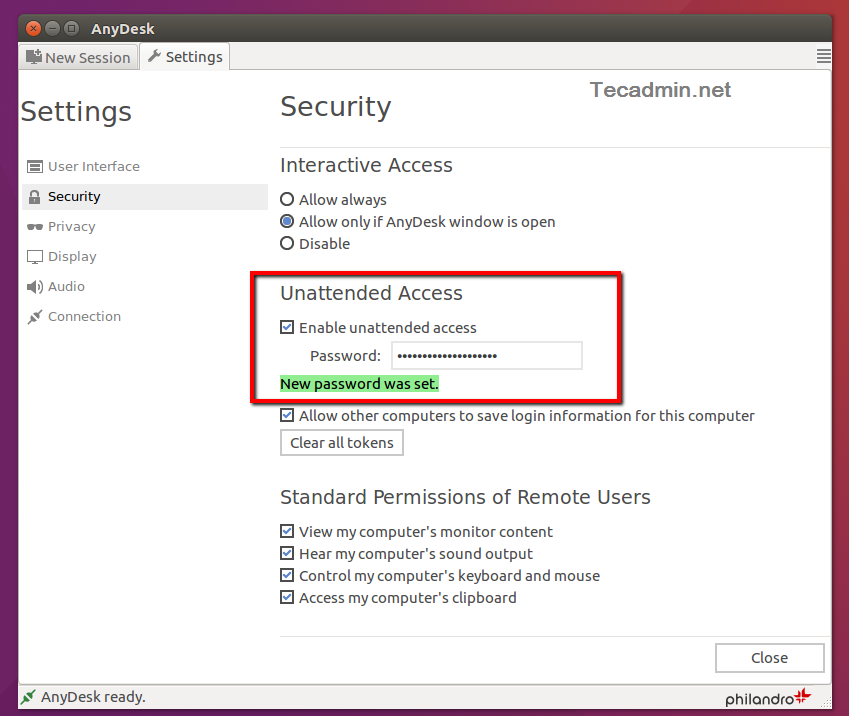
Once installation finished, launch the AnyDesk on your system. You will get an AnyDesk ID for connecting from remote systems using AnyDesk. Now, You may need to set a password for unattended access. This will set a fixed password on your system, Which can be used anytime to connect.
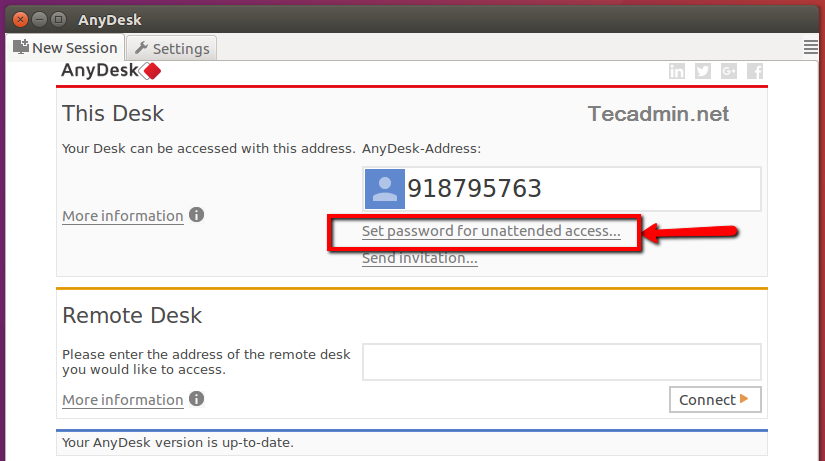
Check the Enable unattended access checkbox and set a secure password.
Step 3 – Connect AnyDesk
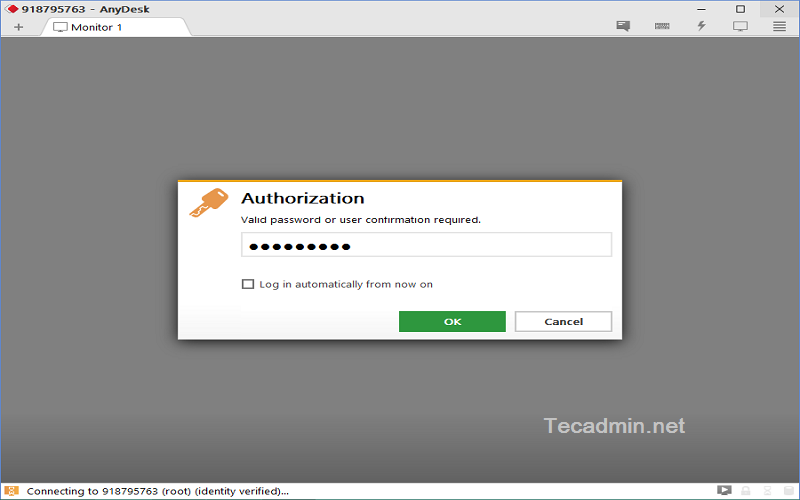
You also need to install AnyDesk on the client system. Then connect from the remote system using the ID provided by AnyDesk and password set in the previous step.
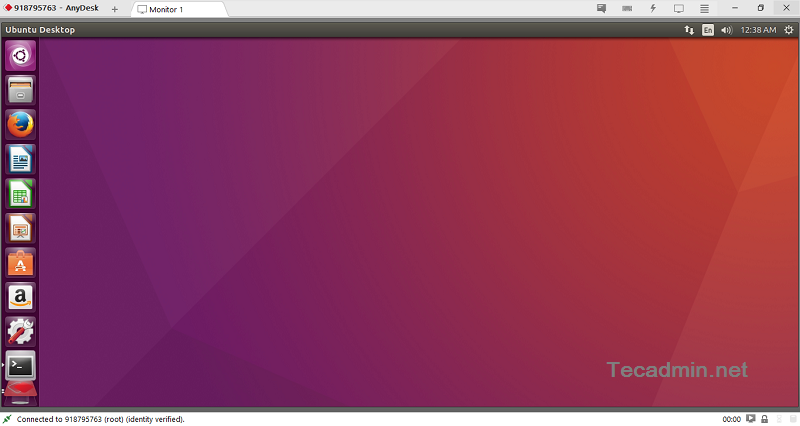
All done. You have access to the Desktop of the remote system.
21 Comments
I manage to install anydesk without any problem on Ubuntu 18.04 … It’s very nice …
nice blog, i found that it is very best
use sudo to run anydesk.
Great steps showcasing installation of Anydesk on Ubuntu. Additionally, one can also use tools like on premise R-HUB remote support servers, Logmein, Teamviewer etc. for all remote access and support needs. They are easy to use and work on all platforms including Ubunutu.
Can AnyDesk be set up using CLI? For your instructions to work, I’d need to be physically present where the machine is for the initial launch and configuration which would be done in a GNome session.
I want to install it on a remote machine that is running CentOS 7. I currently have access via SSH only.
wget https://download.anydesk.com/linux/anydesk_5.1.1-1_amd64.deb
URL not found
Hi Kundan, I have updated the url.
even i am not able to install from above command. Getting error message while processing anydesk.
Yeah, lost me at launch anydesk.
I guess if I could do that I would have never visited here but now I have to go somewhere else.
icon is not showing any where i search it show many times
sorry there is a typing mistake
hi!
great help, thanks!
I have insatlled 5.1.1 on an Ubuntu 18.4 32 system and the security settings are all locked (greyed out) and cannot be changed, I can go into my windows machines but not into my linux box. Any ideas?
thank you…
I’ve installed Anydesk on ubuntu 16.04 server. If it is rebooted or wake on lan remotely, without login, I can connect but I can’t do anything. Keyboard is not working and I can’t login. I must login first and then I can connect and it works fine. Why is it happens? How can I solve it?
If Anydesk is installed on a windows PC, then it works fine anytime.
Thanks for your post.
no allow change “alias” (number to mylinux@ad)
No me funciona en Ubuntu 18.04, al menos no para conectarme a equipos con Windows, he intentado con varios equipos y se cuelga una vez que escribo la contraseña o el usuario al otro lado acepta la conexión. Lo necesito por temas de trabajo, y hace 2 días que me pasé a Ubuntu, cansado de Windows
tuve el mismo problema, lo arregle de esta forma.
en la consola > pkill anydesk
luego abri de nuevo anydesk y pone el password
luego trata de conectarte nuevamente. Deberia funcionar
Your article was useful for me 🙂
Thanks
Nice Artical
Thank you
Thanks, good one and LiteManagerFree is nice alternative too! 😉