Apache HTTP Server is one of the most popular web servers due to its robustness, excellent performance, and a variety of features. Although macOS comes with a built-in version of Apache, many users prefer to remove this version and install the latest one through Homebrew, a package manager for macOS.
This article will guide you through the process of removing the built-in Apache server and installing a new one using Homebrew on macOS.
Prerequisites
Before starting the installation of the Apache (httpd) server using this tutorial you must have the following prerequisites.
- Terminal: You must have Mac Terminal access and little knowledge about working with the terminal application. Ao login to your Mac system and open terminal
- Homebrew: Homebrew is a popular package manager for the Mac operating systems. It is useful for installing most open-source software like Node. Homebrew installation tutorial
Step 1: Remove Built-in Apache Server
macOS comes with a pre-installed Apache server. If you wish to install the latest version of Apache, you need to stop and disable this built-in version first.
- Stop the Apache Server: Open your terminal and type the following command to stop the Apache server:
sudo apachectl stop - Disable the Apache Server: To disable the server from starting up automatically, use the following command:
sudo launchctl unload -w /System/Library/LaunchDaemons/org.apache.httpd.plist 2>/dev/null
Step 2: Install Apache HTTP Server on macOS
- Update Homebrew: Always update Homebrew before installing a new package to ensure that you’re getting the latest version. To update Homebrew, run:
brew update - Install Apache: After updating Homebrew, you can install Apache by running:
brew install httpd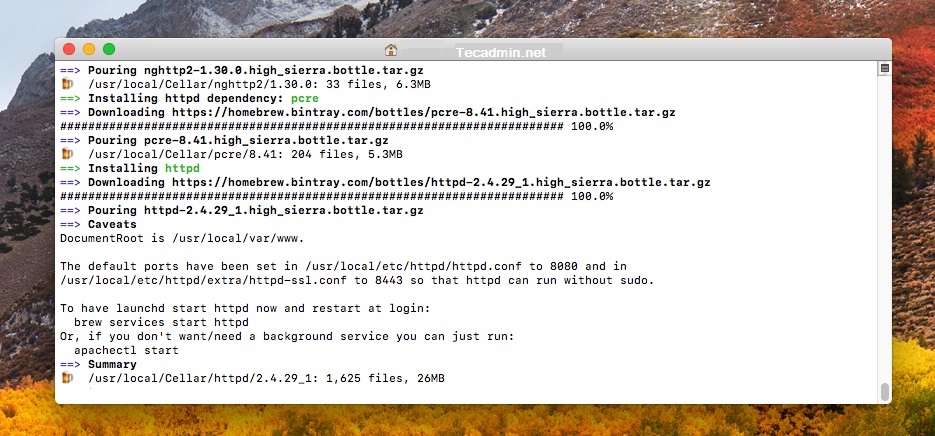
Installing Apache HTTP Server on macOS - Start Apache: Once the installation is complete, you can start Apache by typing:
sudo brew services start httpdYou have successfully installed the Apache webserver via Homebrew, and configured it to auto-start with a privileged account.
- Verify Installation: To verify that Apache was installed correctly, open your web browser and navigate to http://localhost:8080. You should see a message saying “It works!”
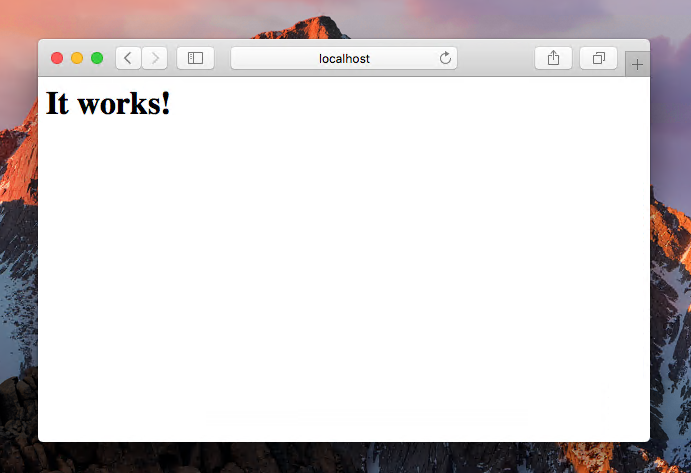
Apache default page on macOS
Step 3: Configuring the Apache HTTP Server
The Apache web server is running now on your macOS system. Now you will want to make some configuration changes according to your local development environment. A configuration file /use/local/etc/httpd/httpd.conf is generated by the installer which you need to edit in a text editor and make following changes.
- Set Apache Port: The Homebrew’s version of httpd uses port 8080. You have to manually change the listen port from the default of 8080 to the standard port 80.
Find the line with Listen 8080and change it to Listen 80 - Change Document Root: Now, configure the document root for Apache. The default document root is set to “/usr/local/var/www”. You can keep the document root unchanged and put your website files to this document root. But I assume you want to change the document root to set it to your home directory.
Change this to point to your user directory where your_user is the name of your user account:
DocumentRoot /Users/rahul/Sites
You also need to change the
In that same
<Directory /Users/rahul/Sites>
   [...]
   #
   # AllowOverride controls what directives may be placed in .htaccess files.
   # It can be "All", "None", or any combination of the keywords:
   #   AllowOverride FileInfo AuthConfig Limit
   #
   AllowOverride all
</Directory>
- Enabling Rewrite Module: Also, you should enable the mod_rewrite module by removing the leading
#symbol from the following line. Search the line and update it. this will enable URL rewrite on Apache.LoadModule rewrite_module lib/httpd/modules/mod_rewrite.so
- Setup User and Group for Apache: As you have configured the Apache document root to your home directory. You will face issues with the permissions because, by default, Apache runs as the user daemon and group daemon (Maybe username and group are to _www). For the personal systems, You can change these to match your user account (replace user_name with your real username), with a group of staff.
  User user_name
  Group staff
Step 4: Create Test HTML Page on Apache
Let’s create a Sites folder in your home directory and create a sample index.html file for testing.
mkdir ~/Sitesecho "Welcome" > ~/Sites/index.html
Restart apache to ensure your configuration changes have taken effect:
sudo apachectl -k restart
Now, Point your browser to http://localhost, This should display your newly created index.html. All done.
Step 5: Managing Apache HTTP Server
Managing your Apache HTTP Server involves starting, stopping, and restarting the service, as well as checking its status. Here’s how you can do it:
- Start Apache Service: If you have stopped the Apache service and want to start it again, use this command:
brew services start httpd - Stop Apache Service: If you need to stop the Apache service, you can do it by typing:
brew services stop httpd - Restart Apache Service: In case you have made changes to the configuration file and need to restart the Apache service for changes to take effect, use this command:
brew services restart httpd - Check Apache Service Status: To check the status of the Apache service, you can use this command:
brew services listThis command will list all services managed by Homebrew along with their status. Look for httpd in this list to check its status.
Remember, every time you make changes to the Apache configuration file, you need to restart the service for changes to take effect.
Step 6: Uninstalling Apache HTTP Server
If you ever need to uninstall Apache HTTP Server installed via Homebrew, you can easily do so by following these steps:
- Stop Apache Service: Before uninstalling, you need to stop the Apache service if it’s currently running. You can do this by typing:
brew services stop httpd - Uninstall Apache: After stopping the service, you can uninstall Apache by running:
brew uninstall httpd - Verify Uninstallation: To verify that Apache has been uninstalled, you can try to navigate to http://localhost (or http://localhost:8080 if you didn’t change the default port) in your web browser. You should no longer see the “It works!” message.
Please note that uninstalling Apache via Homebrew won’t automatically delete the configuration files located in /usr/local/etc/httpd/. If you want to completely remove all traces of Apache, you’ll need to manually delete this directory.
Conclusion
Installing Apache HTTP Server on macOS is a straightforward process when using Homebrew. This package manager simplifies the installation and configuration process, making it easy for anyone to set up a local web server.
It’s important to note that while this guide covers a basic installation, Apache is a powerful and complex piece of software that can be configured in a variety of ways to suit your specific needs. Always refer to the official Apache documentation for more detailed information and advanced configuration options.


25 Comments
Thanks for the info! Good stuff.
Note: with Sequoia all the homebrew http stuff has moved to /opt/homebrew
Thanks a lot!
The only one that worked for me and I’ve trawled the net for two days.
But can you explain/address the comments about continuing to use apachectl after killing the native apache httpd process? Though it works I don’t understand what is linked to what now. I have brew versions php@8.0 but before I ran the ‘sudo launchctl unload -w /System/Library/LaunchDaemons/org.apache.httpd.plist’ command the localhost kept reporting v7.8.3 in spite of linking the brew version. Can’t find any tutorials that explain the process properly.
Man you’re messing up two services. Just stick with brew, use ‘brew services start/stop/restart httpd`
Thank you! that worked perfectly to me.
Why do you say to run `sudo apachectl -k restart` after starting brew services httpd?! Those are two different services. Trying to start apachectl will try to start a separate app that you’ve already stopped and removed from plist.
You’re not supposed to run both if all you need is the brew service.
Why do you run `sudo brew services start httpd`? That changes ownership on /usr files:
“`
% sudo brew services start httpd
Password:
Sorry, try again.
Password:
Warning: Taking root:admin ownership of some httpd paths:
/usr/local/Cellar/httpd/2.4.48/bin
/usr/local/Cellar/httpd/2.4.48/bin/httpd
/usr/local/opt/httpd
/usr/local/opt/httpd/bin
/usr/local/var/homebrew/linked/httpd
This will require manual removal of these paths using `sudo rm` on
brew upgrade/reinstall/uninstall.
Warning: httpd must be run as non-root to start at user login!
==> Successfully started `httpd` (label: homebrew.mxcl.httpd)
“`
You say that running the command will “configure httpd service to be auto-started on system boot”, but brew says it’ll do the exact opposite.
“You have successfully installed Apache web server via Homebrew, and configured it to auto-start with a privileged account.”
What’s the point of starting it with a privileged account? I’m just using it for testing local repo changes. I don’t need https or anything like that.
Since I noticed the folders’ owners were changed to `root` (unlike all other folders in the directory), I stopped the service and changed ownership back to my user.
“`
% sudo chown -R sydcon /usr/local/Cellar/httpd/2.4.48/bin\
/usr/local/Cellar/httpd/2.4.48/bin/httpd\
/usr/local/opt/httpd\
/usr/local/opt/httpd/bin\
/usr/local/var/homebrew/linked/httpd\
“`
Other tutorials I’ve seen show the command without sudo. I don’t know why sudo is needed or recommended here. You don’t mention what Apache needs privileged access for.
Thanks Rahul, Its Very Helpful for me,
if ‘sudo apachectl -k restart’ command give an error, run this command : ‘sudo /usr/sbin/apachectl -k restart’
Thanks Mete, for the useful details.
thank you
Thanks a lot ! This help me so much !
I have configured apache but master process starts as user _www as well (should start as root), so that it can’t reads certificates in /etc/letsencrypt/live/ that are private for root ; is there a way to start correctly master process ? I’m running Mac OS server too and and that’s correctly configured
apache brew:
_www 68719 0,0 0,0 4488604 1808 ?? S Lun11pm 0:00.12 /usr/local/opt/httpd/bin/httpd -k start
_www 68642 0,0 0,0 4488604 1788 ?? S Lun11pm 0:00.08 /usr/local/opt/httpd/bin/httpd -k start
_www 68591 0,0 0,0 4488604 1700 ?? S Lun11pm 0:00.06 /usr/local/opt/httpd/bin/httpd -k start
_www 68042 0,0 0,0 4488604 1796 ?? S Lun11pm 0:00.10 /usr/local/opt/httpd/bin/httpd -k start
_www 67725 0,0 0,0 4488604 1792 ?? S Lun11pm 0:00.11 /usr/local/opt/httpd/bin/httpd -k start
_www 53225 0,0 0,0 4488604 1784 ?? S Dom03pm 0:00.13 /usr/local/opt/httpd/bin/httpd -k start
_www 49737 0,0 0,0 4488604 1788 ?? S Dom07am 0:00.14 /usr/local/opt/httpd/bin/httpd -k start
_www 42715 0,0 0,0 4488676 1768 ?? S Sab05pm 0:00.13 /usr/local/opt/httpd/bin/httpd -k start
_www 37396 0,0 0,0 4488676 1792 ?? S Sab04am 0:00.15 /usr/local/opt/httpd/bin/httpd -k start
_www 24048 0,0 0,0 4488676 1788 ?? S Gio11pm 0:00.14 /usr/local/opt/httpd/bin/httpd -k start
Mac OS server (note process with lower pid as root):
_www 17919 0,0 0,0 4299468 1492 ?? S Gio10pm 0:00.09 /usr/sbin/httpd …
_www 17918 0,0 0,0 4299468 1488 ?? S Gio10pm 0:00.74 /usr/sbin/httpd …
_www 17915 0,0 0,0 4299468 1356 ?? S Gio10pm 0:00.30 /usr/sbin/httpd …
_www 4585 0,0 0,0 4299468 1356 ?? S 11Set19 0:00.10 /usr/sbin/httpd …
_www 4584 0,0 0,0 4299468 1356 ?? S 11Set19 0:00.09 /usr/sbin/httpd …
_www 4583 0,0 0,0 4299468 1356 ?? S 11Set19 0:00.28 /usr/sbin/httpd …
_www 4582 0,0 0,0 4299468 1516 ?? S 11Set19 0:00.51 /usr/sbin/httpd …
_www 4581 0,0 0,0 4299468 1340 ?? S 11Set19 0:00.64 /usr/sbin/httpd …
root 4555 0,0 0,0 4299492 5844 ?? Ss 11Set19 0:26.49 /usr/sbin/httpd …
Thanks bro!
How to install the mpm_itk module for latest version of Apache on Mac?
You saved my life, thx !
Thank you and good job!
awesome! It Works!
Thanks Rahul.
Rahul you are the man!!! Thank you!!!
worked perfect many thanks
Worked up until the last part. Do NOT use ‘/’ , use ‘\’. It worked for me. Also just typing in localhost worked as well. Other than that, well done
Thank you! This worked perfectly.
Very clear and it works!
Thank you Rahul
thanks very much