The mod_wsgi Apache module is used for serving Python scripts over HTTP via the Apache web server. This tutorial helps you to how to install the Apache mod_wsgi module on Ubuntu 18.04 (Bionic Beaver).
Step 1 – Prerequisites
Login to Ubuntu 18.04 server console via SSH and install some prerequisites packages on the system.
sudo apt-get update
sudo apt-get install python libexpat1
Step 2 – Install mod_wsgi Module
Before starting, you will need to install some prerequisite Apache components in order to work with mod_wsgi. You can install all the required components by simply running the following command:
sudo apt-get update
sudo apt-get install apache2 apache2-utils ssl-cert
Now, install mod_wsgi Apache module by running the following command:
sudo apt-get install libapache2-mod-wsgi
Restart Apache service to get mod_wsgi to work.
sudo systemctl restart apache2
Step 3 – Configure Apache for WSGI
Next, create a python script to serve via mod_wsgi Apache module.
sudo vi /var/www/html/wsgi_test_script.py
Add the following content:
1 2 3 4 5 6 7 8 9 10 | def application(environ,start_response): status = '200 OK' html = '<html>\n' \ '<body>\n' \ ' Hooray, mod_wsgi is working\n' \ '</body>\n' \ '</html>\n' response_header = [('Content-type','text/html')] start_response(status,response_header) return [html] |
After that, you need to configure the Apache server to serve this file over the HTTP protocol. Let’s create a configuration file to serve the wsgi_test_script.py script over a sub URL.
sudo nano /etc/apache2/conf-available/mod-wsgi.conf
Add the following content:
WSGIScriptAlias /test_wsgi /var/www/html/wsgi_test_script.py
After completing the above steps enable mod-wsgi configuration and restart Apache service.
sudo a2enconf mod-wsgi
sudo systemctl restart apache2
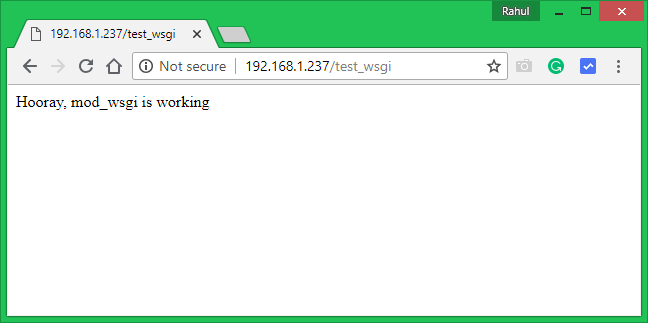
Step 4 – Testing
The setup is ready now. You can test the script by accessing the following URL in a web browser.
http://SERVER_IP/test_wsgi
See below screenshot:

11 Comments
I do have a 404 error, file not found … it seems that WSGIScriptAlias isn’t correctly read by the system (the .py file is readable and if called the browser asks me to dowload it
Fails, error in wsgi_test_script.py – must be html = b’
Very concise and helpful tutorial, thanks!
With Python 3 the example wsgi script gives an error. WSGI expects byte sequences, not strings, e.g.
b’\n’ \
b’\n’ \
This is an excellent tutorial Rahul. I wonder whether you can also write a tutorial or explain how to do this for Webpy + Apache with mod_wsgi on Ubuntu since it is poorly done here: https://webpy.org/cookbook/mod_wsgi-apache-ubuntu
Many thanks
This is an excellent tutorial Rahul. I wonder whether you can also write a tutorial or explain how to this for Webpy + Apache with mod_wsgi on Ubuntu as the poorly done here: https://webpy.org/cookbook/mod_wsgi-apache-ubuntu
Many thanks
This isn’t working for me. I’m using bitnami; so, instead of /var/www/… I have a different directory structure. The mod-wsgi.conf file isn’t at the specified location, and a2enconf isn’t recognized. Any suggestions? Bitnami doesn’t seem to have any instructions for Python or mod-wsgi.
thanks it open now from browser,
but sir others file cant open from /var/www/htnl/ how to open another file from browser
like, http://192.168.1.23/test1_wsgi
Thanks, very concise useful instructions. Now to get django working.
Thanks. After a great deal of searching and faffing with various Stack Overflow type suggestions, your tutorial was ultimately the one that got it working for me.
Your tutorial was very helpful, and concise, mod_wsgi is working now. I have been trying to get mod_wsgi to serve flask apps on my mac for a while now and decided to move to bionic beaver instead. The next step serving flask apps.
Thanks again!