Eclipse is an integrated development environment (IDE) used in computer programming. Eclipse really is the best IDE for Java applications development. Most of the Java programmers preferred to use Eclipse for the Development environment. It contains a base workspace and an extensible plug-in system for customizing the environment.
This tutorial will help you to install Eclipse IDE on Ubuntu 20.04 using snap tool.
Prerequisites
Before continuing for Eclipse installation on Ubuntu 20.04:
- Login to Ubuntu as sudo privileged user
- For the newly installed systems, required to complete initial server setup
Step 1 – Install Java
Eclipse required Java runtime environment to be installed on your system. If you already have Java installed, skip this step. To install Java type:
sudo apt update
sudo apt install openjdk-11-jdk
The JDK package also contains JRE. It will also required to compile a Java program on your system. On the other hand, Use next tutorial, to install specific Java version.
Step 2 – Install Eclipse
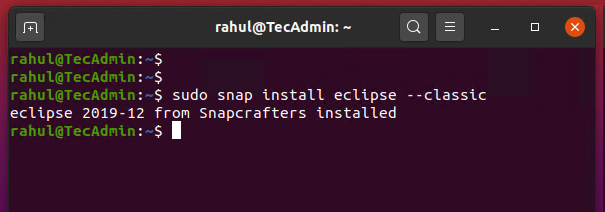
Ubuntu 20.04 preferred to use snap for package installation instead of using apt package manager. To install Eclipse IDE on your machine type:
sudo snap install eclipse --classic
It will download the eclipse IDE snap package and install on your machine. Once the installation completed successfully, you will see the following output.
Step 3 – Start Eclipse IDE
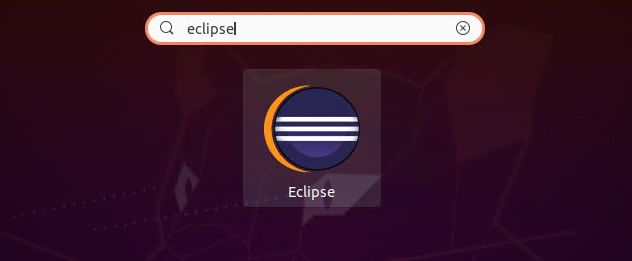
Now, The Eclipse IDE has been installed on your Ubuntu 20.04 system. Search for the Eclipse launcher in and click on it.
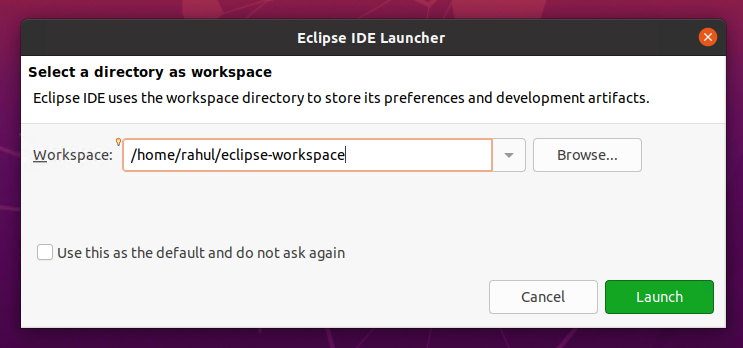
During the launch, Eclipse will ask you to set a Workplace. This will be default location for your Eclipse to save files of your application’s build on Eclipse.
Check the checkbox “Use this as the default and do not ask again” to make this location as default with next launch. click launch button to start eclipse:
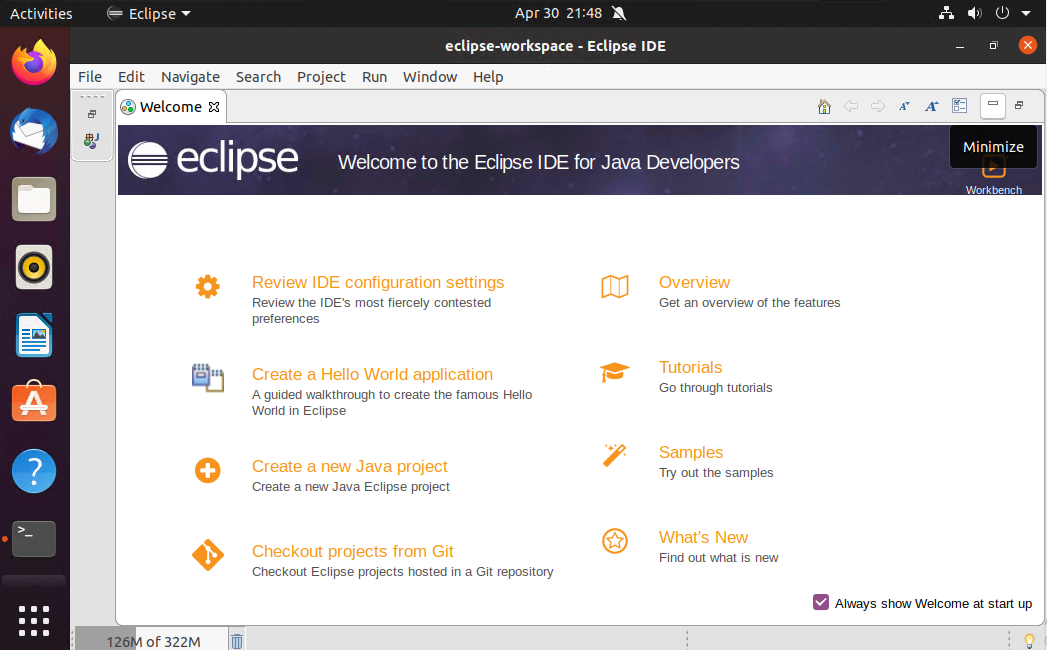
Eclipse IDE running on your Ubuntu 20.04 system.
To disable to welcome screen on next launch, Remove check of “Always show the Welcome at start up” n bottom-right of the IDE.
Conclusion
You have installed Eclipse IDE on your Ubuntu 20.04 LTS system. Let’s start working with your application.

1 Comment
is there any way to install eclipse without snap in ubuntu 20.04?
it happened I recently upgrade from 18.04 to 20.04 my ubuntu version and i had installed eclipse and could run it from the desktop but now i couldn’t.
thanks in advance