Ubuntu is a most popular Linux-based operating system. Recently Ubuntu releases its newest version 15.04 (Vivid Vervet). VirtualBox is also a popular software for creating virtual machine available for Windows and Linux environment.
Download Ubuntu ISO:
Visit following urls to dowload latest version of Ubuntu ISO.
Ubuntu Desktop: http://www.ubuntu.com/download/desktop
Ubuntu Server: http://www.ubuntu.com/download/server
Download and Install VirtualBox
We are assuming you have pre-installed VirtualBox on your system. If you don’t have already installed it, Visit below link and install latest version of VirtualBox on your system.
https://www.virtualbox.org/wiki/Downloads
Steps to Install Ubuntu On VirtualBox
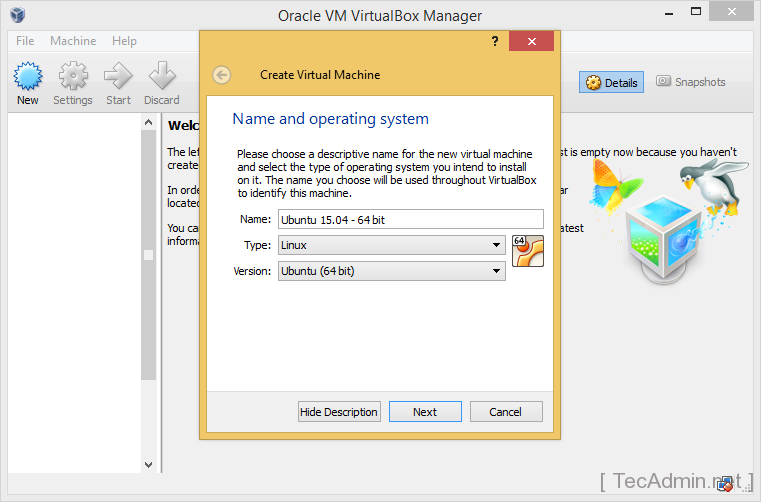
- 1. Start VirtualBox and click New button to create virtual machine. Input name of your vm and select appropriate type and version and click
Next .
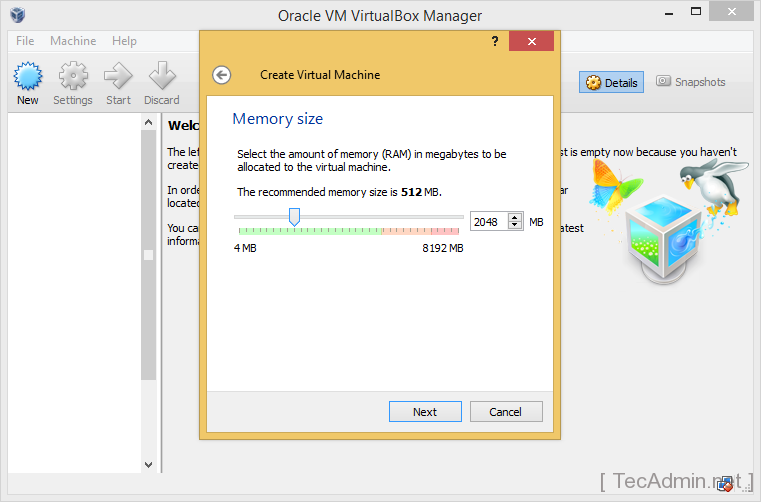
- 2. Select the memory size to allot to new vm as per below screenshot.
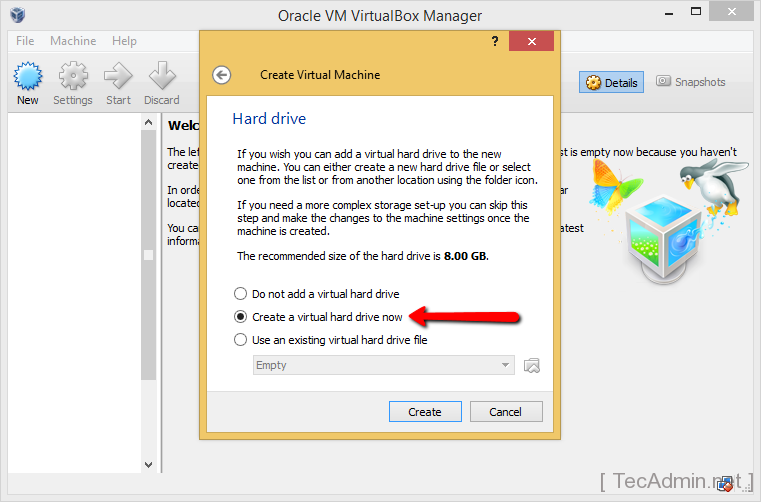
- 3. As we are creating new virtul machine so just select option “Create a virtual hard drive now” and click
Create button.
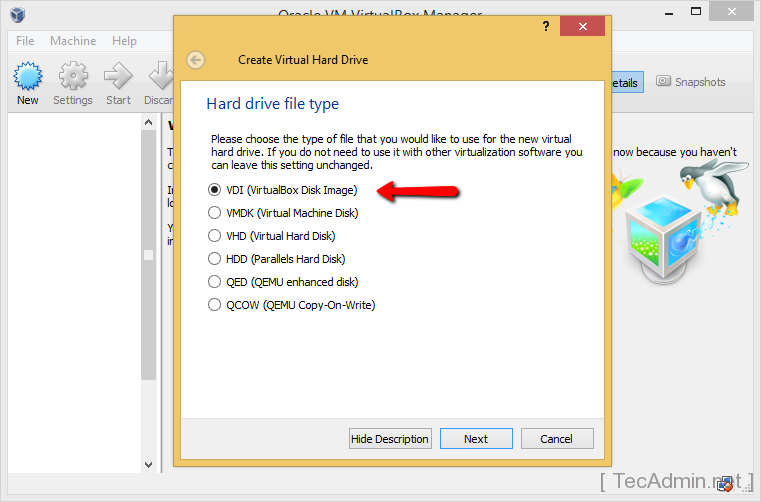
- 4. Choose the type of virtual hard drive file to be created. Default VDI format is selected. You may select other formats If you want to use these hard drive with other virtualization software’s.
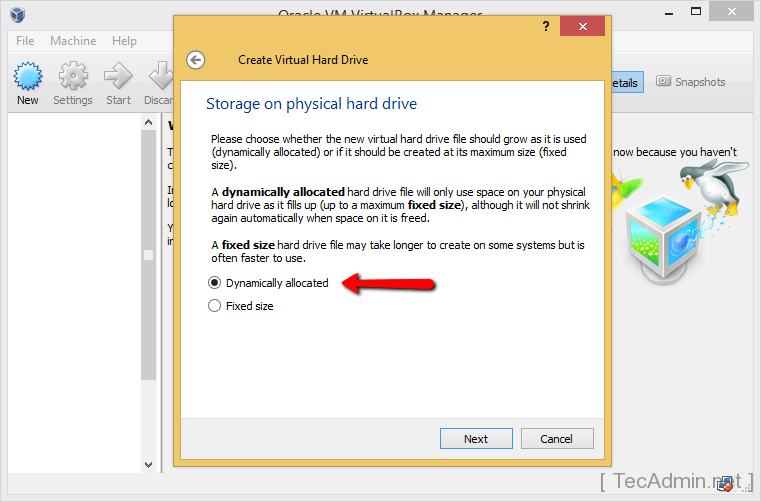
- 5. Select type of disk allocation. We suggest to use option “Dynamically allocated”. Using this option hard drive grows on system as it fills only.
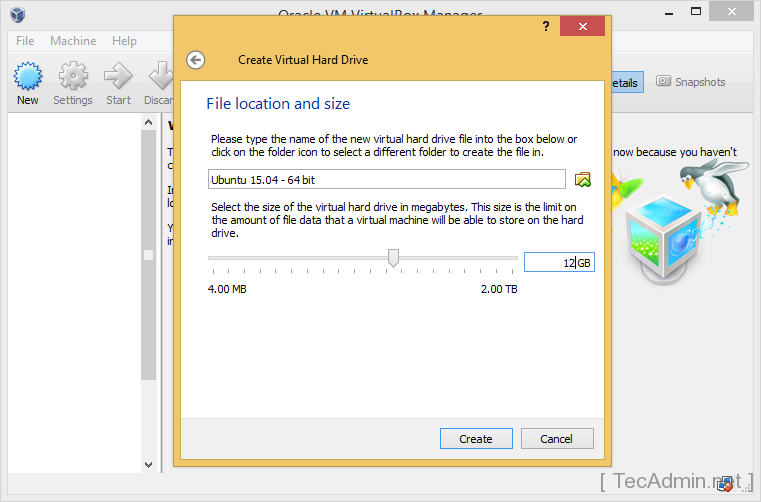
- 6. Select eh location of files to be created in system and size of hard drive to be created. Now click “Create” button.
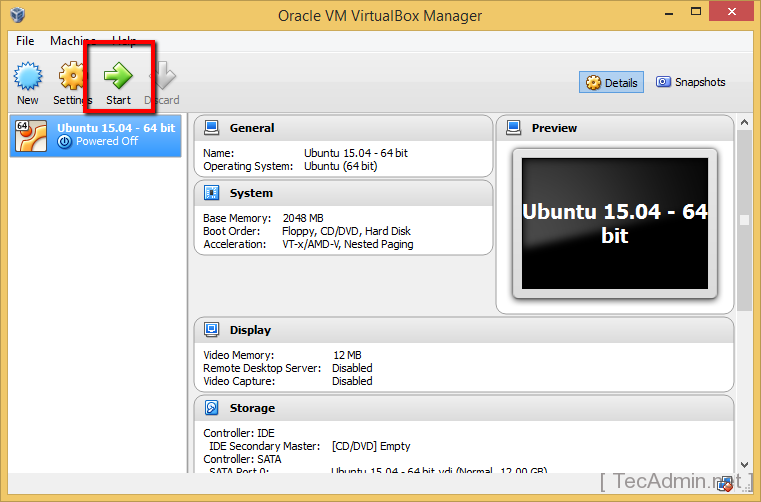
- 7. At this stage you have create an Ubuntu virtual machine without operating system. Now We will install operating system on this virtual machine.
Open VirtualBox and select create vm. Click on Start button as per showing below screencast.
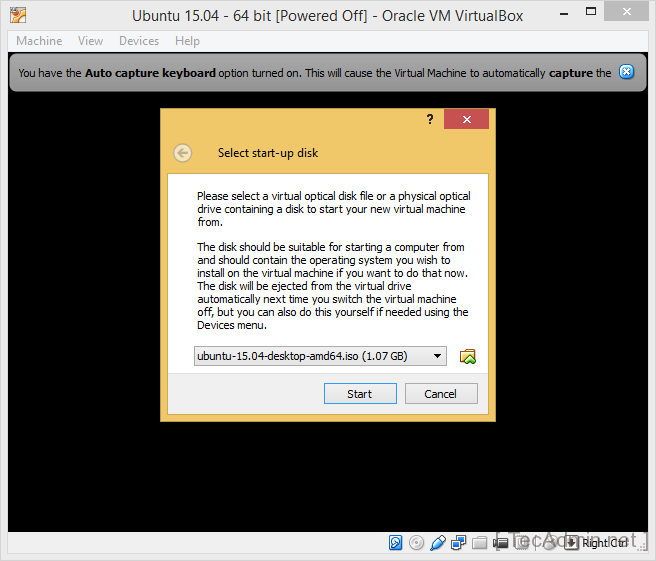
- 8. As operating system is not installed, It will ask for bootable drive.
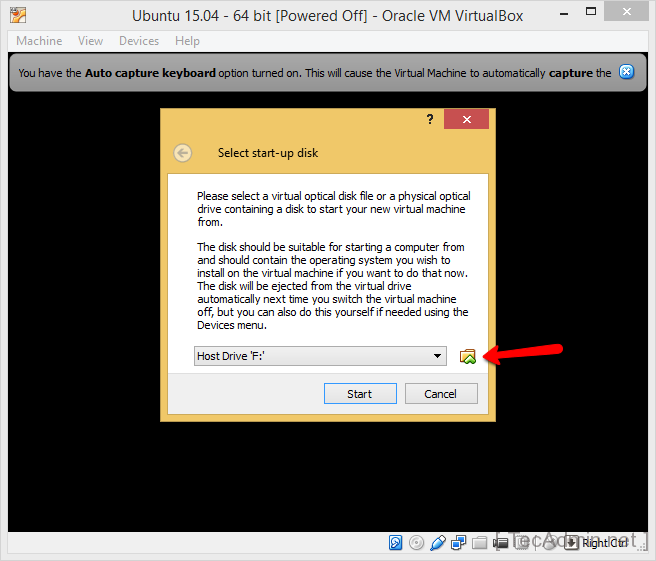
Select the ISO of downloaded Ubuntu operating system and click
Start button.
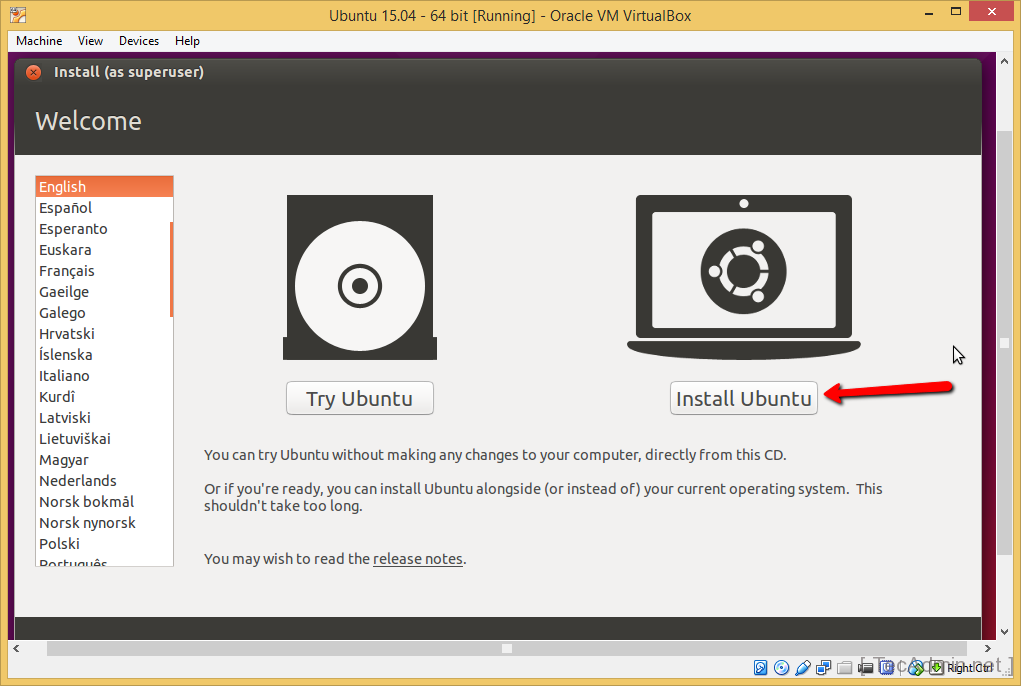
- 9. After booting the vm, You will see screen like below. You can simply start ubuntu without installing. To install permanently select
Install Ubuntu to begin installation.
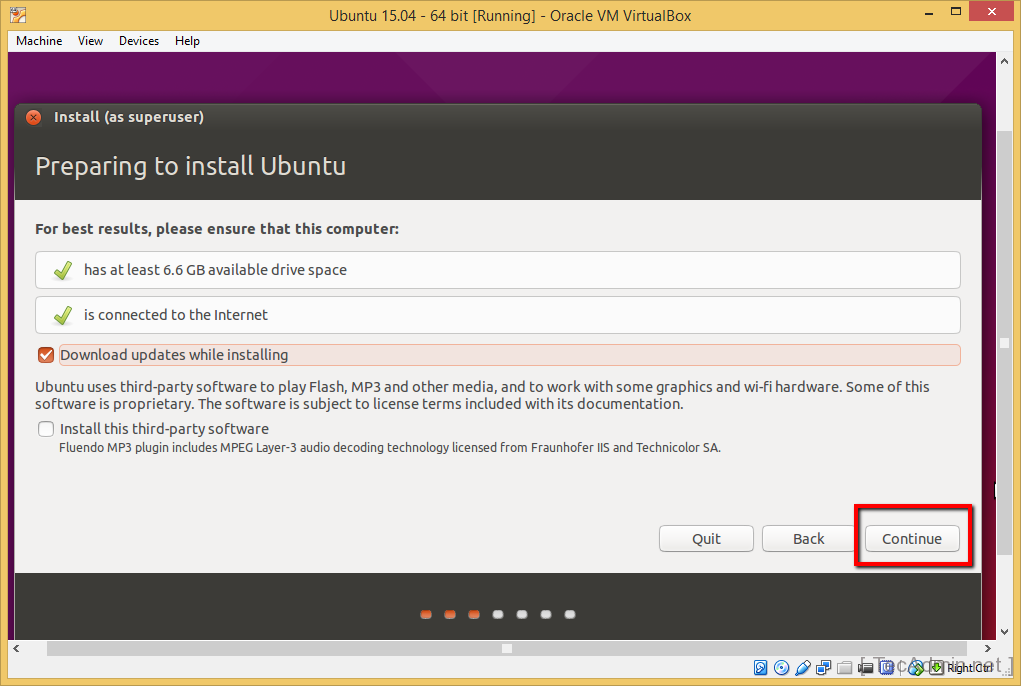
- 10. Ubuntu will prepare to install. You can select option “Download updates while installing” to install updated packages and click Continue.
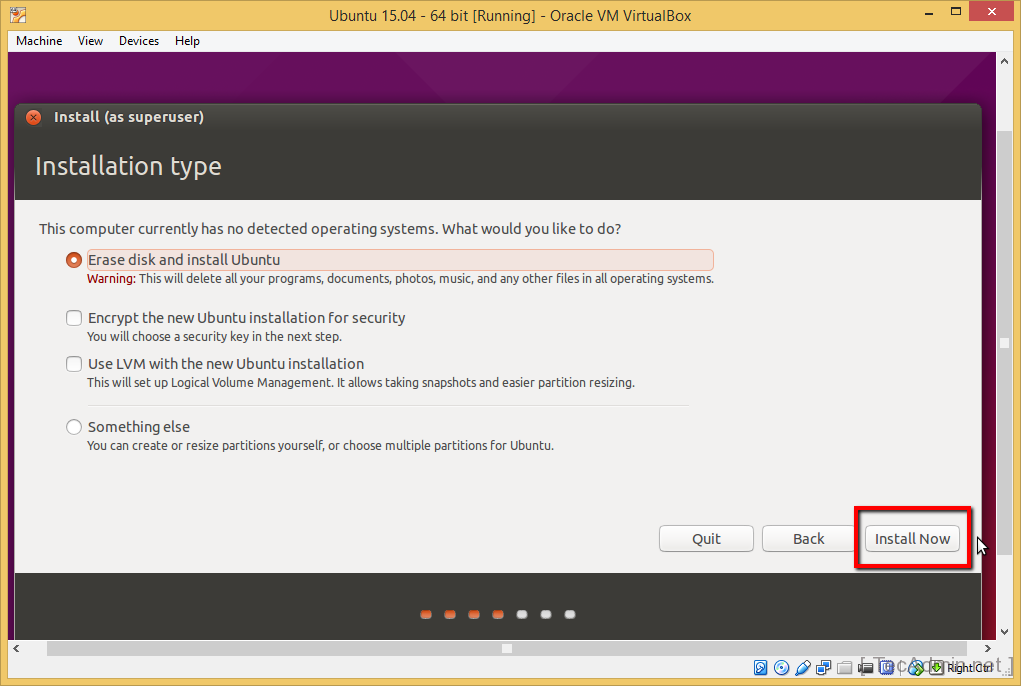
- 11. Installation type:- Select Erase disk and install Ubuntu option and click on
Install Now button.
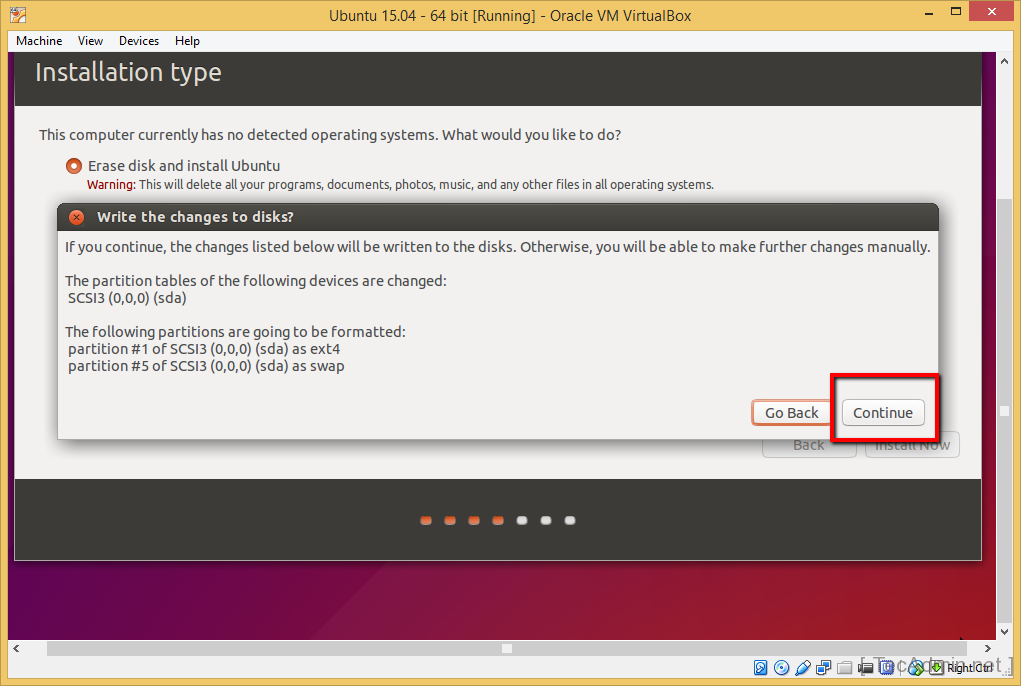
- 12. Just click on
Continue button.
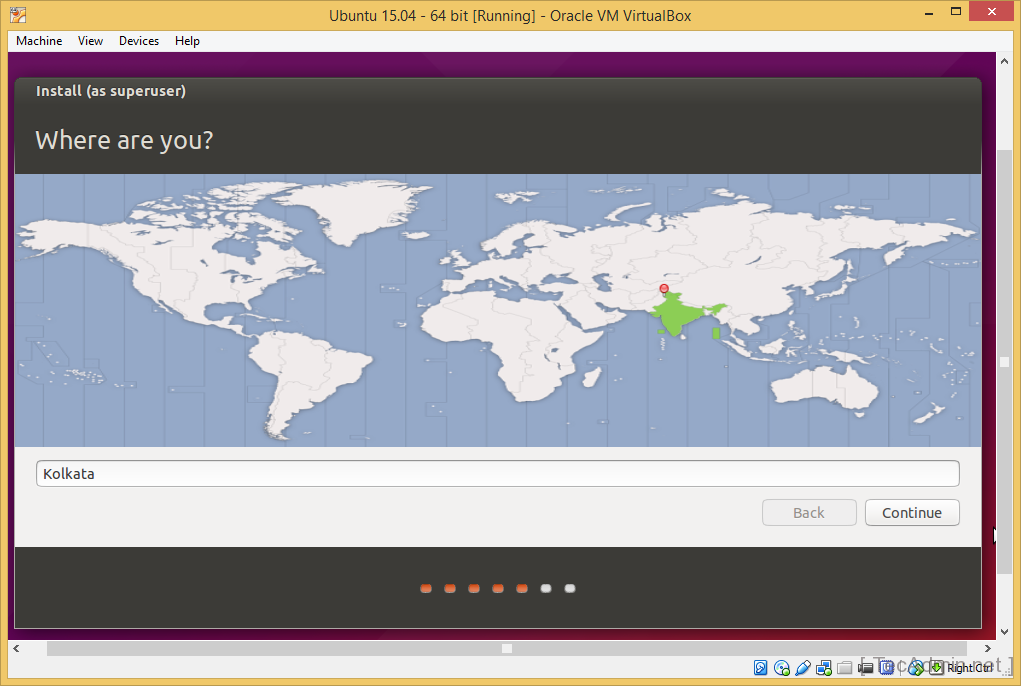
- 13. Select the location the server resides to properly setting system date time and click on
Continue button.
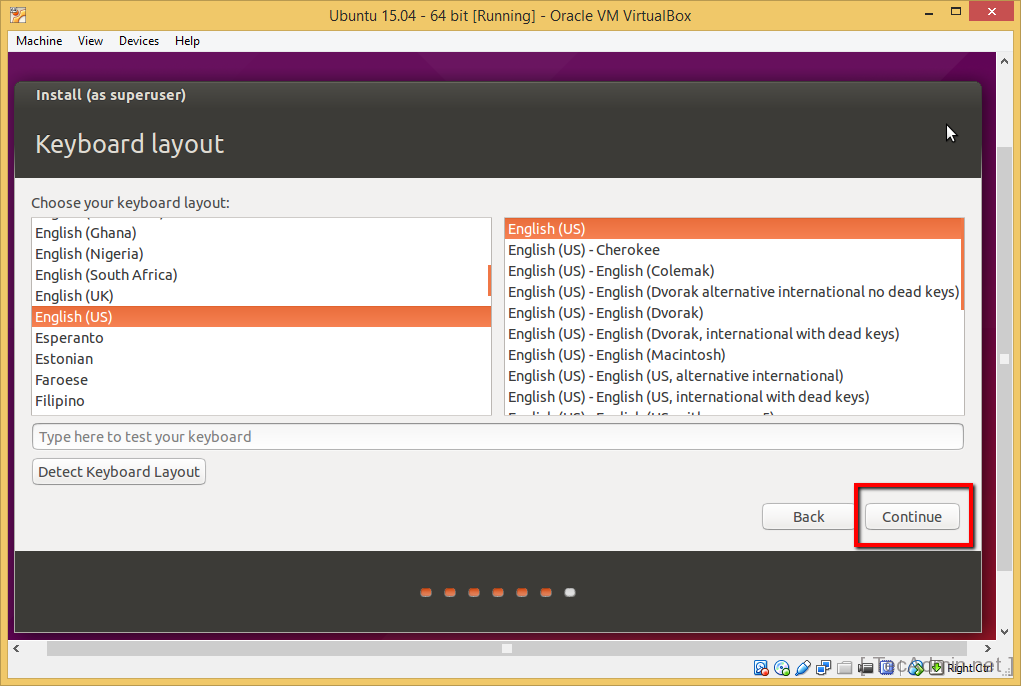
- 14. Select the keyboard layout as per your language and click on
Continue button.
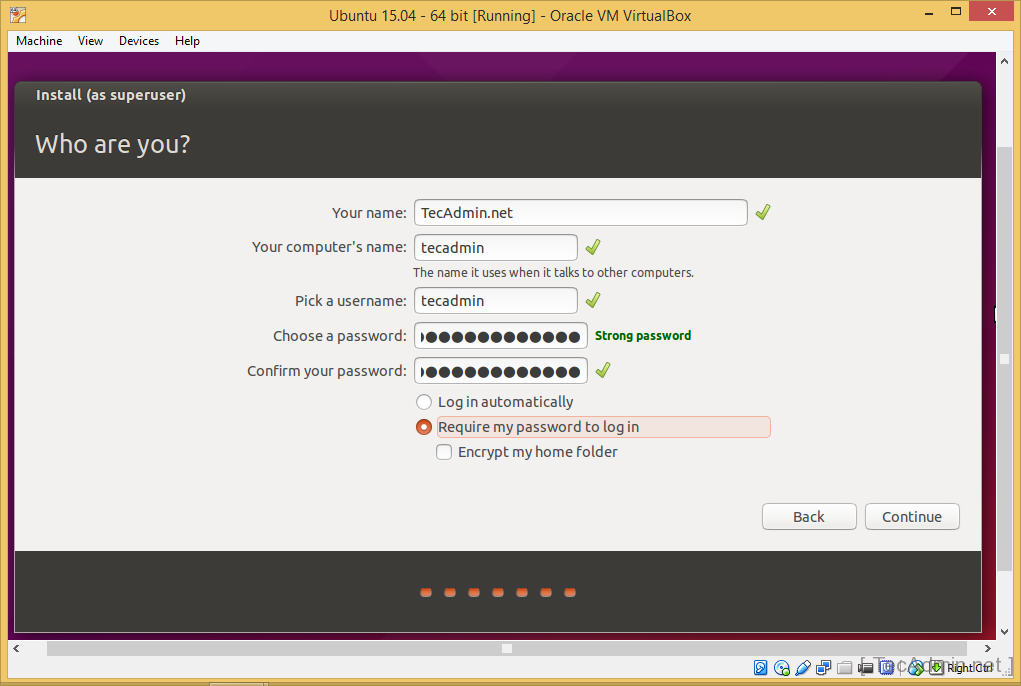
- 15. Enter your name, username and password to configure your system identity and click on
Continue button
This will start the Ubuntu installation on VirtualBox. Wait for installation completed. - 16. After completing installation virtual machine will ask for reboot. Reboot the virtual machine to complete installation. After rebooting you will get login prompt like this.
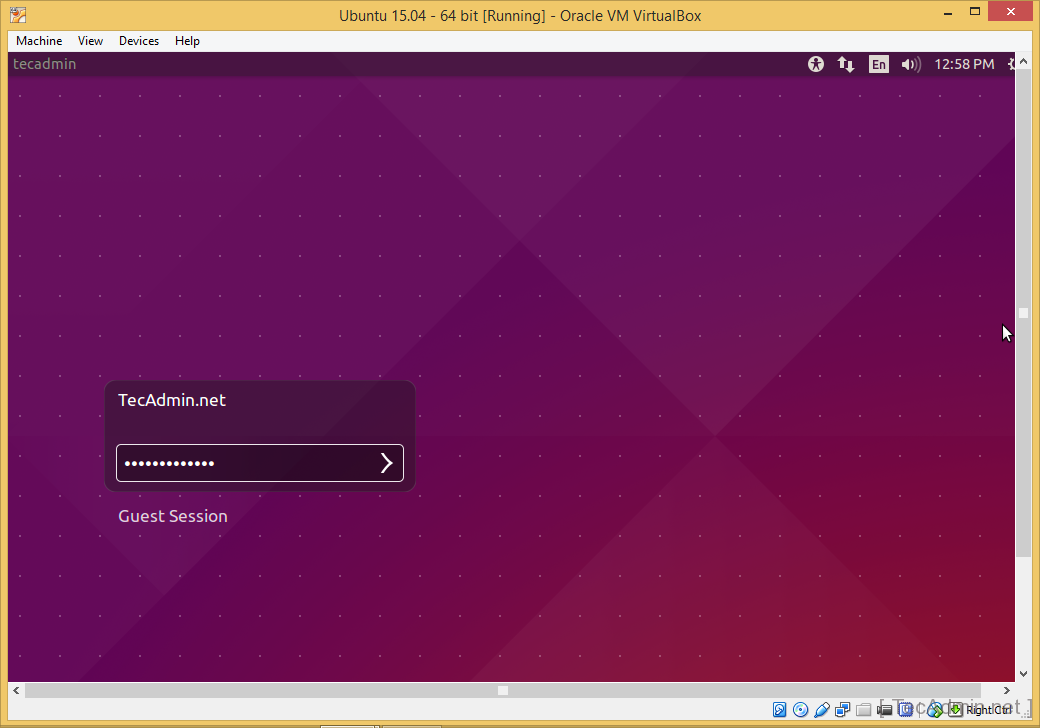
Your Ubuntu virtual machine has been successfully installed.

1 Comment
Hey there! I simply want to give you a huge thumbs up for your great information you have
here on this post. I am coming back to your site for more
soon.