A LAMP stack is a popular combination of open-source software that is used to power web applications. It is composed of four main components: the Linux operating system, the Apache web server, the MySQL relational database management system, and the PHP programming language. In this tutorial, we will guide you through the process of installing the LAMP stack on Fedora, a popular Linux distribution.
Step 1: Update System Packages
Before installing the LAMP stack, it is important to update the system packages to ensure that you have the latest version of the software. To do this, open the terminal and enter the following command:
sudo dnf update
Step 2: Install Apache Web Server
Apache is a free and open-source web server software that is used to serve web pages over the internet. To install Apache on Fedora, run the following command:
sudo dnf install httpd
Once Apache is installed, you need to start the Apache service and enable it to run at boot time. Run the following commands to do this:
sudo systemctl start httpdsudo systemctl enable httpd
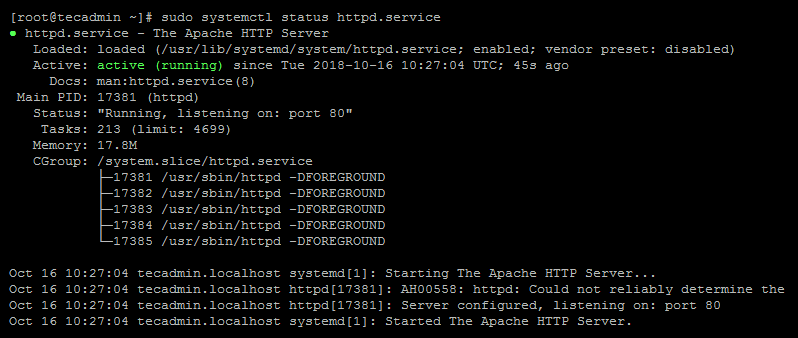
Then verify httpd service is running properly:
sudo systemctl status httpd
Step 3: Install MariaDB Database Server
MariaDB is a popular open-source relational database management system. To install MySQL on Fedora, run the following command:
sudo dnf install mariadb-server
Don’t like MariaDB? Use this tutorial to install MySQL on Fedora.
After installing MySQL, you need to start the MySQL service and enable it to run at boot time. Run the following commands to do this:
sudo systemctl enable mariadbsudo systemctl start mariadb
Step 4: Secure MySQL Installation
By default, MySQL installation is not secured. You need to run the following command to secure it:
sudo mysql_secure_installation
Follow the onscreen instructions. The default password is none. Change your root account password and Press Y for all other operations to apply improved security.
- Enter current password for root (enter for none): [ PRESS ENTER ]
- Set root password? [Y/n] y
- New password: [ ENTER PASSWORD HERE ]
- Re-enter new password: [ RE-ENTER PASSWORD HERE ]
- Remove anonymous users? [Y/n] y
- Disallow root login remotely? [Y/n] y
- Remove test database and access to it? [Y/n] y
- Reload privilege tables now? [Y/n] y
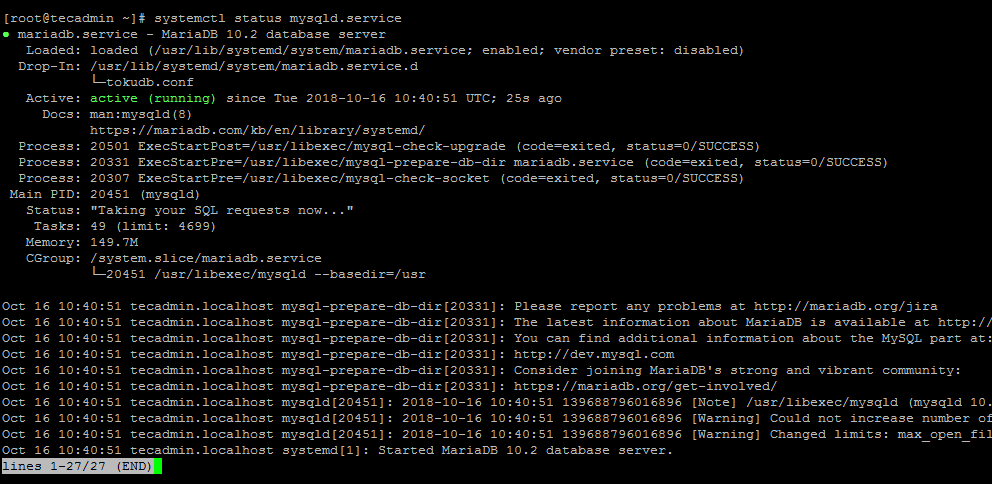
Now check the MariaDB service status.
sudo systemctl status mariadb
Step 5: Install PHP
PHP is a popular programming language that is used to develop dynamic web pages. To install PHP on Fedora, run the following command:
sudo dnf install php php-common php-mysqlnd
You may also require some modules as per your requirements. Install the required PHP modules on your system.
sudo dnf install php-xml php-json php-gd php-mbstring
Verify the current active PHP version on your system
php -v

PHP 7.2.17 (cli) (built:  Apr 18 2019 14:12:38) ( NTS )
Copyright (c) 1997-2018 The PHP Group
Zend Engine v3.2.0, Copyright (c) 1998-2018 Zend Technologies
Step 6: Add Firewall Rules
As per our reader’s comment. I am including the below steps to enable firewall access for HTTP(80) and HTTPS(443). To understand about FirewallD read our next tutorial.
sudo firewall-cmd –permanent –add-service=httpsudo firewall-cmd –permanent –add-service=https
Then reload the firewall daemon to apply the above changes.
sudo systemctl reload firewalld
Step 7: Restart Apache
After installing PHP, you need to restart the Apache service to ensure that PHP is loaded. Run the following command to do this:
sudo systemctl restart httpd
Step 8: Test the LAMP Stack
To test if the LAMP stack is working properly, you need to create a PHP file in the web root directory. Run the following command to create a PHP file:
sudo nano /var/www/html/info.php
Paste the following code into the file:
1 2 3 | <?php phpinfo(); ?> |
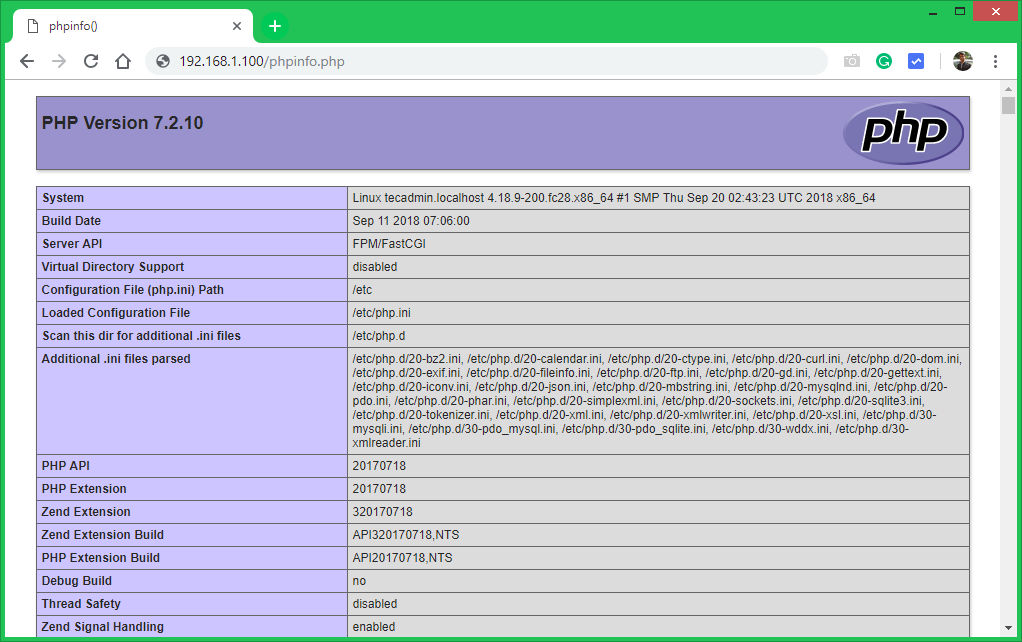
Save and exit the file. Now access the info.php file using your system IP address in a web browser. To find your system IP use the command
nmcli -p device show
Now open a web browser and enter the following URL: http://localhost/info.php
Conclusion
In this tutorial, we have walked you through the process of installing the LAMP stack on Fedora. The LAMP stack is a powerful combination of software that is used to power web applications. By following the steps outlined in this tutorial, you should now have a working LAMP stack on your Fedora system. You can now begin developing and deploying web applications using this powerful technology stack.


19 Comments
Hellow. I’m trying to install joomla but there are some problems with /var/www/html folder permissions and it ask fpt account during installation process. Is it correct to leave as root user permissions or must be apache user for this folder? In any case it does not work on fedora 34 🙁
Thanks
Hello nice tutorial, just need add
systemctl start php-fpm
and later when install php and php-common just restart http using
systemctl restart httpd
nice job and nice web congratulations!
Apache isn’t handling PHP pages properly for me. It offers them for download instead of executing them. From what I’ve read on older versions, it needs a shared object loaded in httpd.conf, but I cannot find that .so on my system.
Looks like, PHP extension is not enabled in Apache.
How can i change the default directory to be like a folder public_html in home instead of /var/www/html?
Some of the commands were slightly different on my version of Fedora, dunno why I’m new to Fedora.
These are what I had to type in for the firewall settings:
firewall-cmd –permanent –add-service=http
firewall-cmd –permanent –add-service=https
and then I had to restart apache like Lucas abouve
sudo systemctl restart httpd
In Fedora 33 I had to use
sudo firewall-cmd –add-service=http –add-service=https ––permanent
sudo systemctl stop firewalld
sudo systemctl start firewalld
I followed all these steps but I am stuck in the final tep where the page is taking too long to load and is not displaying the phpinfo page. I get a connection timed out , 192.168.1.100 taking too long to respond message.
Your ip address might not be 192.168.1.100
Type “nmcli -p device show” to get this information, it can be something like 127.0.0.1
Thank you so much
Ah c’mon. It’s a dash dash / hyphen hyphen
Trying again:
It’s — before permanent and add-service
CentOS 7:
firewall-cmd –permanent –add-service=http
firewall-cmd –permanent –add-service=http
firewall-cmd –permanent –add-service=http
firewall-cmd –permanent –add-service=https
systemctl reload firewalld
those three commands save my day… especially the last one … reloading the firewall daemon … *doh*
You’re using the incorrect syntax
firewall-cmd –zone=public –add-service=http –permanent
firewall-cmd –zone=public –add-service=https –permanent
systemctl reload firewalld
Tanks!!
Great tutorial!
In my machine when I went to “http://192.168.1.100/phpinfo.php” i saw the php source code.
To solve the problem I restarted the apache running this command on therminal.
$ sudo systemctl restart httpd
Apart from this, everything was ok.
Disculpa con la ip funciona sin ningún problema, pero porque al poner localhost no se muestra nada?
thank you