Laravel is a popular PHP framework that provides a range of tools and features for building web applications. In this tutorial, we will guide you through the process of installing Laravel on Fedora, a popular Linux distribution.
We will cover the prerequisites for installing Laravel on Fedora, such as installing PHP and a web server, and we will walk you through the steps to install Laravel using Composer, a dependency manager for PHP. We will also provide some tips and best practices for configuring and optimizing Laravel on Fedora.
By the end of this tutorial, you will have a fully functional Laravel installation running on Fedora, and you will be ready to start building your own web applications with Laravel.
Suggested tutorials:
Step 1 – Install Packages
PHP is required to run the Laravel applications. As a backend database, you can use the MySQL/MariaDB server. Here is a short instruction for the installation of the LAMP stack on Fedora. It’s required to run the Laravel framework on your Fedora system. You can also use this guide for the detailed instructions to setup LAMP environment on Fedora systems.
Install Apache
sudo dnf install httpd
Install MySQL
sudo dnf install mariadb-server
sudo systemctl start mariadb.service
/usr/bin/mysql_secure_installation
Install PHP
sudo dnf install php php-zip php-mysqlnd php-mcrypt php-xml php-mbstring
Install Composer
sudo dnf install composer unzip
Step 2 – Install Laravel on Fedora
To download latest version of Laravel, Use below command to clone master repo of laravel from github.
cd /var/www/
git clone https://github.com/laravel/laravel.git
Navigate to the Laravel code directory and use the composer to install all dependencies required for the Laravel framework.
cd /var/www/laravel
composer install
Dependency installation will take some time. After that set proper permissions on files.
chown -R username:apache /var/www/laravel
chmod -R 755 /var/www/laravel
chmod -R 755 /var/www/laravel/storage
SELinux enabled systems also run the below command to allow writing on the storage directory.
chcon -R -t httpd_sys_rw_content_t /var/www/laravel/storage
Step 3 – Configure Laravel Environment
Laravel uses .env file for environment configuration. Use .env file for configuring all the environment variables for your application like the database, SMTP, security key, etc.
cp .env.example .env
Now set the 32-bit long random number encryption key, which is used by the Illuminate encrypter service.
php artisan key:generate

Application key set successfully.
You can view the .env file to find the Application key is configured. In addition, you can also update the MySQL database configuration details in .env file as below.
DB_HOST=localhost
DB_DATABASE=laravel
DB_USERNAME=username
DB_PASSWORD=password
Step 4 – Run Laravel with Artisan
For the development purpose, you can run a Laravel application with Artisan command-line interface. Artisan starts a Laravel development server on your system, which you can access in a web browser.
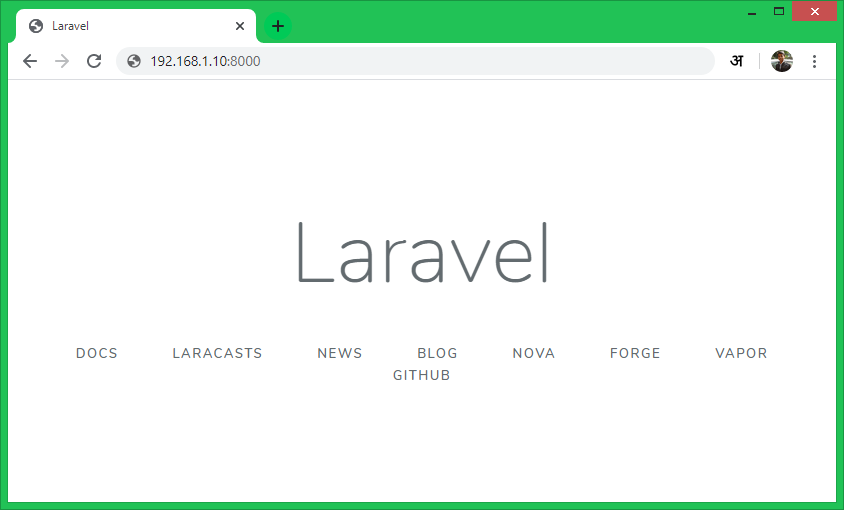
php artisan serve

Laravel development server started: http://127.0.0.1:8000
The default Artisan starts Laravel on port 8000 for localhost only. To access Laravel over the network specify your system IP with –host option or use IP 0.0.0.0 for public access.
You can also use –port followed by the port number to use another port to serve the Laravel application. For example, use the below command.
php artisan serve --host 0.0.0.0 --port 8000

Laravel development server started: http://0.0.0.0:8000
Step 5 – Setup Laravel with Apache
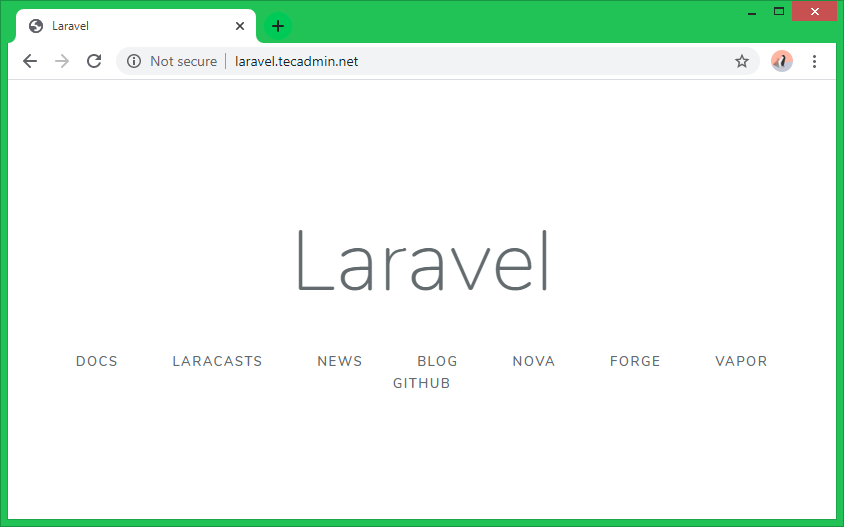
Now add a Virtual Host in your Apache configuration file to access the Laravel framework in a web browser. To create an Apache configuration file /etc/httpd/conf.d/laravel.conf
sudo vi /etc/httpd/conf.d/laravel.conf
and add the following settings:
<VirtualHost *:80>
       ServerName laravel.tecadmin.net
       DocumentRoot /var/www/laravel/public

       <Directory /var/www/laravel>
              AllowOverride All
       </Directory>
</VirtualHost>
Save your file and restart the Apache service:
sudo systemctl restart httpd.service
Then access the Laravel website in a web browser with the specified domain name. Make sure the domain/subdomain is correctly pointed to the Laravel server in DNS.
Conclusion
In this tutorial, we have covered the steps to install Laravel on Fedora, a popular Linux distribution. We have discussed the prerequisites for installing Laravel, such as installing PHP and a web server, and we have provided a detailed guide on how to install Laravel using Composer, a dependency manager for PHP.
We have also provided some tips and best practices for configuring and optimizing Laravel on Fedora, such as setting the correct permissions on directories and files and enabling the mod_rewrite module.
By following the steps in this tutorial, you should now have a fully functional Laravel installation running on Fedora, and you should be ready to start building your own web applications with Laravel. If you have any questions or need further assistance, please don’t hesitate to ask.