phpMyAdmin is a well most popular web-based client for managing MySQL server. PHPMyAdmin is written in PHP programming language. It provides a user-friendly web interface to access and manage your databases. To ease usage to a wide range of people, phpMyAdmin is being translated into 72 languages and supports both LTR and RTL languages. This article will help you to install phpMyAdmin on CentOS/RedHat System.
Prerequsities
In order to use PHPMyAdmin, you must have PHP, MySQL and Apache installed on your system. Also, you need PHP-MySQL or PHP-MySQLi module enabled in PHP configuration. For the current version of PHPMyAdmin 4.7.2, the requirements are as follows.
- Apache >= 2.2
- PHP >= 5.5
- MySQL/MariaDB >= 5.5
Use the tutorial: Installing Apache MySQL PHP on CentOS and RedHat
Step 1 – Enable Remi Repository
phpMyAdmin most updated package is available in Remi repository. Install it in your system using the following commands.
### CentOS/RHEL 7 ###
rpm -Uvh http://rpms.famillecollet.com/enterprise/remi-release-7.rpm

### CentOS/RHEL 6 ###
rpm -Uvh http://rpms.famillecollet.com/enterprise/remi-release-6.rpm
Step 2 – Install PhpMyAdmin on CentOS
After enabling Remi repository on your system, let’s start the with the installation of phpMyAdmin using yum package manager. All the dependencies will automatically be installed.
yum --enablerepo=remi,remi-test install phpMyAdmin
Step 3 – Configure PhpMyAdmin
phpMyAdmin by default allowed to access from localhost only. If you want to make it accessible from remote computers edit Apache configuration file of phpMyAdmin.
sudo vi /etc/httpd/conf.d/phpMyAdmin.conf
Now check for below section. Change Require local to Require all granted, This will disable local restriction access and phpMyAdmin will be accessible from the network.
1 2 3 4 5 6 7 8 9 10 11 12 13 14 15 16 17 18 | Alias /phpMyAdmin /usr/share/phpMyAdmin Alias /phpmyadmin /usr/share/phpMyAdmin <Directory /usr/share/phpMyAdmin/> AddDefaultCharset UTF-8 <IfModule mod_authz_core.c> # Apache 2.4 Require all granted </IfModule> <IfModule !mod_authz_core.c> # Apache 2.2 Order Deny,Allow Deny from All Allow from 127.0.0.1 Allow from ::1 </IfModule> </Directory> |
After updating phpMyAdmin Apache configuration file, restart Apache service to reload new settings.
service httpd restart
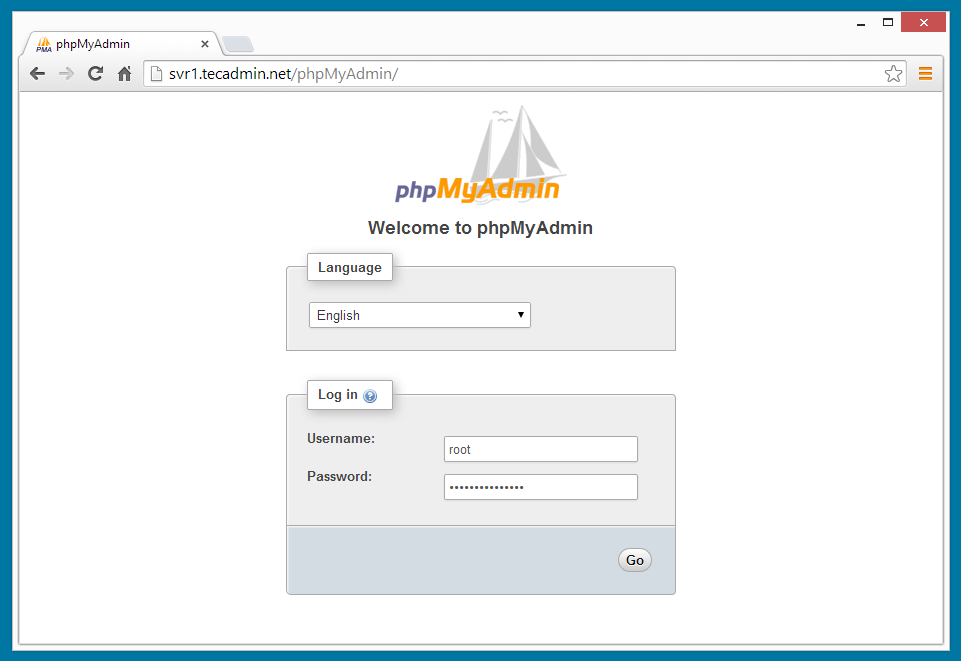
Step 4 – Access phpMyAdmin in Browser
Now you can access phpMyAdmin in a browser using the following URL. Change
http://svr1.tecadmin.net /phpMyAdmin/ Login Details: Use MySQL username and password.
34 Comments
Cannot log in to the MySQL server
I have used mysql user and password, getting above error
please help me out rahul
How to install PHPmyadmin for PHP 7.3?
Error: Package: php-tidy-5.4.16-7.el7.x86_64 (epel)
Requires: php(zend-abi) = 20100525-64
Installed: php-common-7.3.2-1.el7.remi.x86_64 (@remi-php73)
php(zend-abi) = 20180731-64
Available: php-common-5.4.16-46.el7.x86_64 (base)
php(zend-abi) = 20100525-64
Error: Package: php-tidy-5.4.16-7.el7.x86_64 (epel)
Requires: php(api) = 20100412-64
Installed: php-common-7.3.2-1.el7.remi.x86_64 (@remi-php73)
php(api) = 20180731-64
Available: php-common-5.4.16-46.el7.x86_64 (base)
php(api) = 20100412-64
Error: Package: php-mbstring-5.4.16-46.el7.x86_64 (base)
Requires: php-common(x86-64) = 5.4.16-46.el7
Installed: php-common-7.3.2-1.el7.remi.x86_64 (@remi-php73)
php-common(x86-64) = 7.3.2-1.el7.remi
Available: php-common-5.4.16-46.el7.x86_64 (base)
php-common(x86-64) = 5.4.16-46.el7
Error: Package: php-bcmath-5.4.16-46.el7.x86_64 (base)
Requires: php-common(x86-64) = 5.4.16-46.el7
Installed: php-common-7.3.2-1.el7.remi.x86_64 (@remi-php73)
php-common(x86-64) = 7.3.2-1.el7.remi
Available: php-common-5.4.16-46.el7.x86_64 (base)
php-common(x86-64) = 5.4.16-46.el7
You could try using –skip-broken to work around the problem
You could try running: rpm -Va –nofiles –nodigest
Hello, have you a solution? I have same issue
Hi find solution
yum install -y –enablerepo=remi-php73 phpmyadmin
Hi,
Thanks its very useful for me ………
@ PHIL
:: TO ALLOW FROM EVERY WHERE ::
## Comment below section to allow everyone
Order Allow,Deny ( Change # 1)
Allow from All (Change # 2)
Allow from 192.168.1.0/24
Allow from ::1
Hello
Useful article and I have translated to persian in following link
http://www.irwebhost.com/blog/
Thank you
please some one should send me test on how and procedure on how i can install my phpmy on my computer have been finding it difficult please
Works perfect!
Thanks a lot on this article.
PS: how to setup to access from anywhere?
I am getting this error
phpMyAdmin – Error
The json extension is missing. Please check your PHP configuration.
I am using centOs.
I have a 404 erorr on page /phpMyAdmin/
Thank you.
When I attemp to install Remi it says that it could not ressolve the host, HELP
Hi!
I have successfully installed it and when I try to login. I enter my credentials. It loads and still stay at the login page.
It never change the page.
I just installed on Centos 6 on a dedicated server. The install following these instructions went flawlessly without errors. I also followed the directions for PHP and Apache. THANK YOU! However, I cannot view phpMyAdmin in my browser. I have tried going to it via “FQDN/phpMyAdmin/” and by “http://my.IP/phpMyAdmin/” and neither works. I know its probably something I did in Step. 3 but not sure how to configure this file for web access.
Can anyone provide a phpMyAdmin.conf scenario that will allow me to access via web??
Thank you in advance!
This is a great article and is laid out for a very easy installation. Thank you!
HI mjdj1999,
Please change “Allow from 192.168.1.0/24” in phpMyAdmin.conf file with your LAN ip or system ip. If you have any confustion about which ip to use. You can open it publicly like “Allow from all“
please how can I know mysql user and password?
Hi Tom,
Password will be same as you set during installation.
When I do the first step, I get this
Retrieving http://rpms.famillecollet.com/enterprise/remi-release-6.rpm
warning: /var/tmp/rpm-tmp.9YYBPo: Header V3 DSA/SHA1 Signature, key ID 00f97f56: NOKEY
error: Failed dependencies:
epel-release >= 6 is needed by remi-release-6.5-1.el6.remi.noarch
So I dont continue. Please tell me how to fix it?
Hi Fahad,
Please install EPEL package firt – Instruction’s – http://tecadmin.net/add-epel-repository-in-centos-rhel/
We will update article soon.
Thanks for the tutorial, it was very simple and worked great for me.
nice to read your article it insatll sucessfully but what will be the user name & password to login it??? please reply
Use mysql user and password.
Very nice!
Thanks for providing steps to configure PHPMyAdmin… its work for me without any hurdles.
Cheers…
thx, it works.
I’m running into a problem in step #2 : yum install phpMyAdmin
Where “conflicts” are found!!!
Please help.
Thanks
Kern —
Transaction Check Error:
file /usr/share/mysql/charsets/README from install of mysql-libs-5.1.73-3.el6_5.i686 conflicts with file from package MySQL-server-5.5.35-1.linux2.6.i386
file /usr/share/mysql/charsets/Index.xml from install of mysql-libs-5.1.73-3.el6_5.i686 conflicts with file from package MySQL-server-5.5.35-1.linux2.6.i386
file /usr/share/mysql/charsets/armscii8.xml from install of mysql-libs-5.1.73-3.el6_5.i686 conflicts with file from package MySQL-server-5.5.35-1.linux2.6.i386
file /usr/share/mysql/charsets/ascii.xml from install of mysql-libs-5.1.73-3.el6_5.i686 conflicts with file from package MySQL-server-5.5.35-1.linux2.6.i386
…
Hi Kern,
It looks phpMyAdmin is also updating MySQL server on your system. In this case we recommend to install it using source code, which is pretty simple :
http://tecadmin.net/setup-phpmyadmin-on-linux-using-source/
Thank you for sharing this article…..
really, very good
THANKS!
Hello admin
I have followed above steps, but I m getting 403 access denied error…… please help me
Thanks in advance
Note that you need to change the URL to 127.0.0.1 instead of 192.168.1.100 or what ever IP address you have.
URL: http://127.0.0.1/phpMyAdmin/
Dear Rahul:
Thank you for getting this up I was in a big hurry and found it comprehensive and useful.
Best,
P.